Friday, September 14, 2018

Coffee and Tea Themed Cards

Hero Arts August 2018 My Monthly Hero Kit

Coffee

As soon as I saw this kit, I had to have it!  There are all kinds of possibilities for making encouragement cards for my girlfriends, which I love -- those are my favourite cards to make.  I was inspired by a number of watercolouring videos that I've watched on YouTube lately, so that was where I started with this set of cards.
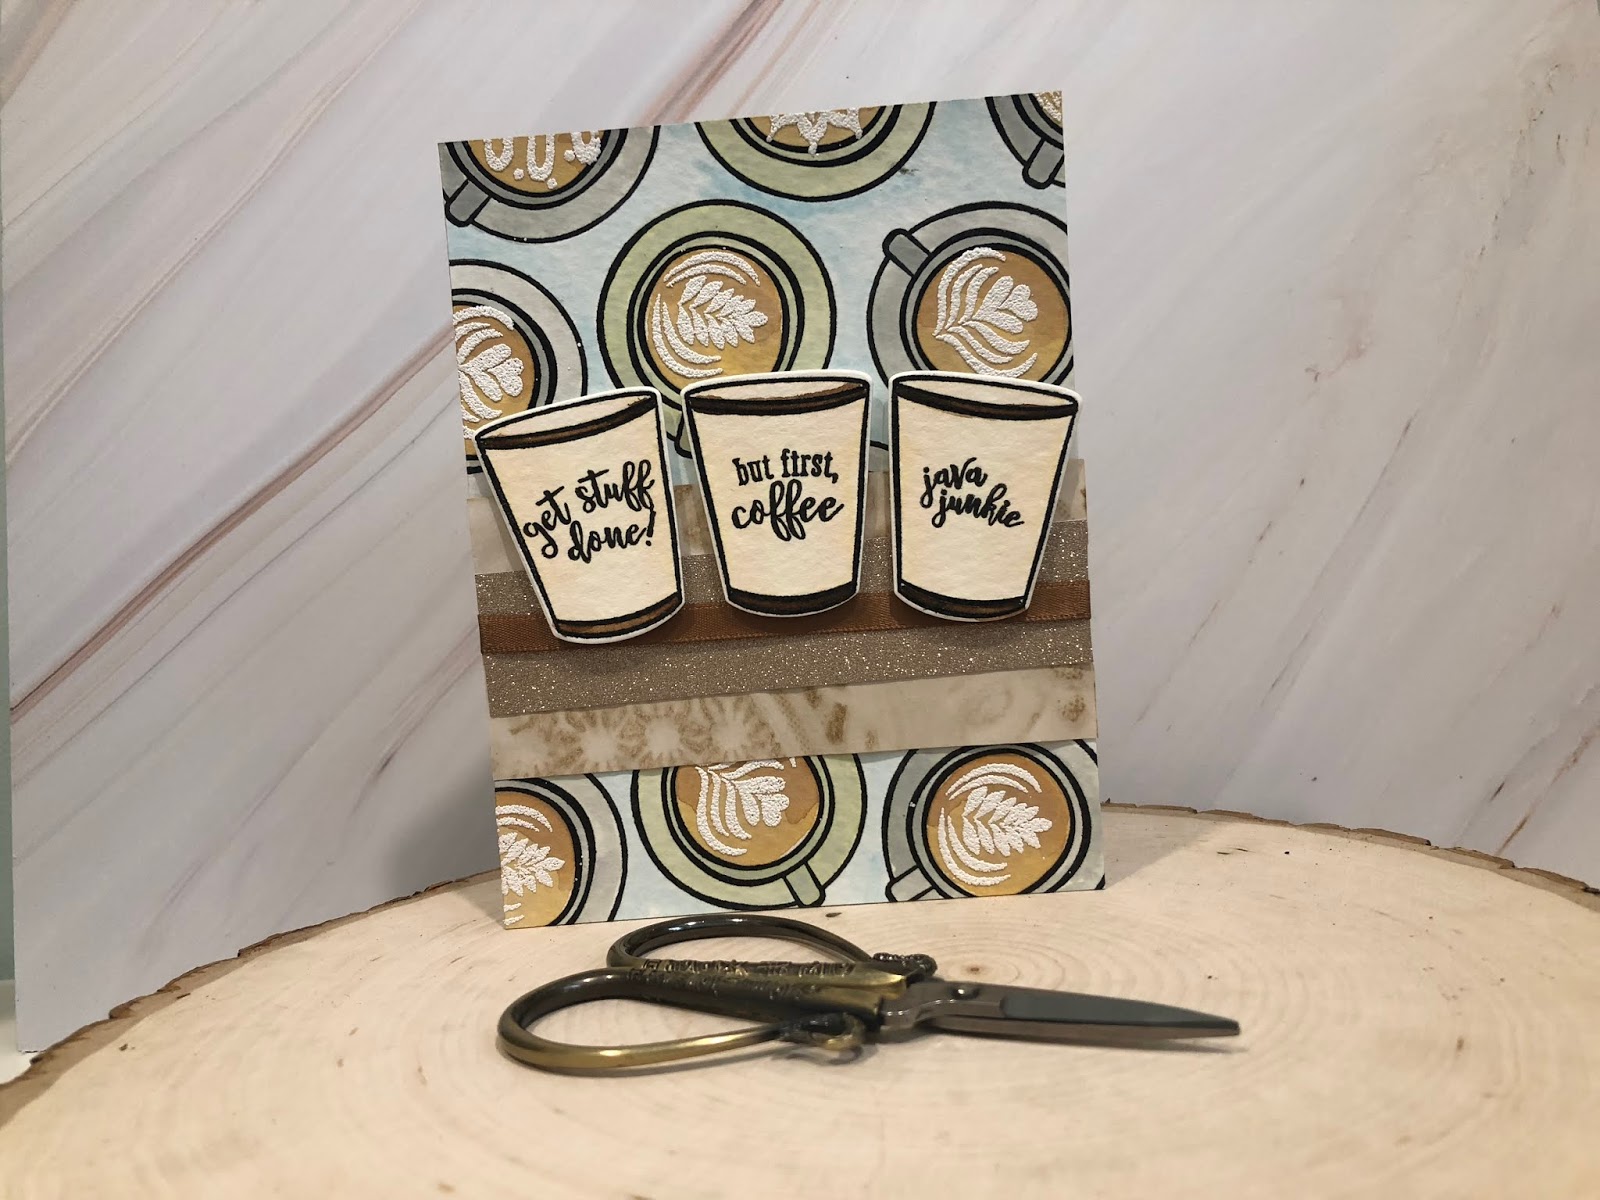


My friends tend to be coffee drinkers, so I used mostly the coffee-themed cups.  For the coffee cards I took a large scrap of watercolour paper that I had and covered it with the top view cups using Versafine Onyx Black Ink.  I let that dry and then used my Distress Oxide Inks with a water brush to paint the cups, alternating green and grey, then I coloured in the coffee with brown and, finally, I painted around the cups with a light blue wash.  My goal was a neutral tone background.

Once the background dried, I added a variety of cream designs to the cups using Versamark embossing ink.  The final touch was to add the puffy embossing powder, also included in the kit,  to the "cream" and heated it to set. 


I then cut the background down to use pieces of it on several cards.  The top card has a full card panel made from the background and the remainder of the cards incorporate smaller pieces.  I accented each card with a piece of the coffee-stained paper that was included in the kit.  I also used strips of gold foil or gold glitter paper from some Die Cuts With A View 6 x 6 inch paper packs that I have in my stash.  On one of the cards I added a strip of brown ribbon (from the kit).


The last step was to stamp and colour some of the mug and cup images from the kit.  I used Nuvo Aqua Flow pens to colour these images.  After letting them dry, I added sentiments and die cut the images.

Tea

I made an additional card in the same style that is tea-themed and I used brighter colours.


Below is a picture of all four cards together.  Because I'm a tea drinker, I'm partial to the tea-themed card!


Wednesday, September 12, 2018

Birthday Cards using Concord & 9th Stamps and Dies

Birthday Cards

I continue to make birthday cards and I have wanted to use the Sprinkles turnabout stamp by Concord & 9th for some time.  The stamp comes with additional birthday themed images and sentiments, and there is also a coordinating set of dies that includes a very handy little tag.

 As I usually do, I made the same card design in several colour combinations. 

On the first card, I used a red and blue theme.  I stamped the sprinkles on the background using red, blue, green and brown inks.  The cupcake images offer several options.  There are two different outlines, two different cupcake cups, two different icing styles and two types of sprinkle toppings.  I mixed and matched the cupcake components to coordinate with the card colour theme. The next step was to die cut the tag in blue paper (from my scrap bin).  Then, I die cut the stamped cupcake images, stamped a sentiment on the tag in black (although, I wish now that I had used a brighter colour), stamped some sprinkles on the top of the tag and embossed them with red embossing power. As a finishing touch, I added some twine in red and blue to decorate the top of the tag.  The tag was then adhered to the card panel with foam squares and the panel was adhered to a top folding card base.

To the left, the same card design with a similar colour scheme, but with a red tag and yellow in the background sprinkles instead of the brown.

Below a brighter version of the card with a pool coloured tag and brighter colours used for the background sprinkles.  This one is my favourite colour combination.


A mix of the red and blue colour combination and the teal.

Monday, September 10, 2018

Birthday Cards for Kids

A Variety of Card Styles and Colours

I am making some cards for my sister's stash.  My nephew is at the age where he attends quite a few birthday parties for his friends and I said that I would make some cards for him to have on hand.  I started by using some dies from the June 2018 Spellbinders monthly die subscription.  The set includes a candle and a cupcake with some flower embellishments.

Candles

I created the same version of this card several times, but added a different number of candles to the front of each thinking that the card could be used for a person the age of the number of candles on the card.

My scrap bin came in handy for making the candles for these cards.  I used my Momento Tuxedo Black marker to colour the wicks of the candles. 

I kept the cards fairly simple.  I used patterned paper on the base of each card from the Swirly Fun 6 x 6 paper pad (by Your Next Stamp).  The card bases are made from Neenah Solar White 80lb cardstock.  I popped the candles and flames up using foam squares and the sentiment is from the Altenew Birthday Builder stamp set.


Cupcakes

I made a couple of cupcake birthday cards in traditional masculine colours, blue and green.  Of course, there had to be a candle on the cupcake for a birthday card.

I like that the dies have embossing detail in them.  In order to take advantage of this option, after die cutting the image you run the die cut image through the machine again,  using an embossing mat instead of the bottom cutting plate.  The pressure from the machine essentially squishes the paper into the embossing areas on the die and you wind up with an embossed pattern.  Easy peasy.

You'll notice that there are embossing line details on the cupcake wrapper, swirls in the cupcake icing and (although it is hard to see) curved line details in the candle and the flame.  The embossing creates extra dimension in the images.  Next time, I think I'll blend a bit of distress ink over the images to make the embossing lines more visible.  


I created a second version of the card using traditionally feminine colours.  This is the same design as the masculine version, but I added the decorative flowers to the pink and red(ish) versions of the card.  The flowers also have embossing detail, which adds to the image.

Again, I used patterned paper from the Swirly Fun paper pack by YNS.

Friday, September 07, 2018

Cool Summer kit from Simon Says Stamp

Summer Themed Cards

Is anyone else not ready to let go of summer?  Autumn is my favourite season, but I'm just not ready to let go of the warm, lazy days of summer.  It's a dilemma, so what's a girl to do?  Make some more summer themed cards, of course!

Flamingos!

I was inspired by a design Heather Ruwe shared in the inspiration sheet that comes in the kit.  She created a background with the watermelon stamp from the One Cool Pineapple stamp set.  I loved that design and I used that idea with each of the images in the set, starting with the flamingo (what says summer better than flamingos?).

I stamped the images on smooth bristol paper and coloured them with Nuvo Aqua Flow pens and used a bit of water to pull the colour out into the images, for a light watercolour look.  I added a hand typed sentiment on a die cut stitched rectangle that I adhered to a die cut scalloped rectangle, which I popped up.  The friend I'm planning to send this card to will get a kick out of the cheeky sentiment!

For my second flamingo card, I used the Nuvo Aqua Flow pens to create a sunny beach scene for my die cut flamingo.  I cut the handsome fellow out of Simon Says Stamp glitter cardstock and added him to the scene.  Next, I added the sentiment, which is from the One Cool Pineapple stamp set, and added a flock of "pigeons" to the background.  It's a fun summer themed card.

I am quite enjoying the Nuvo Aqua Flow pens, but I clearly need a bit more practice!

Summer fruit


Pineapples make me happy!  They remind me of Hawaii, which is one of my favourite places in the world.  Adding the cool sunglasses to them just makes me like them even more.  In addition to colouring the pineapples, I also added a light blue wash between and around them, for a bit of added interest.  I made sure to leave room for the sentiment, and added the panel to a top folding card base.


Watermelon always makes me think of summer.  Same design and colouring technique as with the other backgrounds I created, but I added some stamped hearts in the white space between the slices.  I like that added touch.  It provides a touch of black on the card to match the stamped sentiment.


Summer images

The variety of summer images in the One Cool Pineapple stamp set is part of what drew me to purchase the kit.  Well, second to the flamingo, of course.  😉  The sunshiny face, the cactus and the fish were all perfect summer images.  There is a little something for everyone.


Wednesday, September 05, 2018

General Purpose Cards

Gina K Designs Daisy Delight Stamp Set

I normally choose stamp sets that have matching dies, for convenience; however, when I saw this stamp set I could not resist.  The daisies are beautiful.  I decided to stamp two of each daisy image to colour with Copic markers and used a spring colour for one and a more fall feeling colour for the other (because those are my favourite seasons).


Once the images were coloured, I fussy cut them.  Instead of adhering them to a plain white card base, I raided my stash of coloured cardstock scraps and created pink and burnt yellow card bases, to coordinate with the Copic colouring.  In order to jazz up the white cardstock layer in between the card base and the image, I used embossing folders to add some texture.


Since I didn't want to take away from the beauty of the images, I did not add a sentiment.  I will add a sentiment on the inside, once I decide for what purpose I will use these cards.  Although, I very much like how they turned out and may decide to decorate my hobby room with them, instead.  ;-)

Monday, September 03, 2018

Lawn Fawn Birthday Cards

Birthday Cards for my Stash

My birthday card stash was a little low, so I thought I would make some cards that could be used for a variety of ages.  Since I absolutely love my Lawn Fawn stamps and dies, I thought I would use those products and make multiple cards in the same style.  I also used two different background colours, both of which can be used for either male or female recipients.


The side-fold card base is made from Lawn Fawn cardstock in Peacock (above) or Chili Pepper (below).  I cut the Quilted Backdrop die cut cover plate out of Neenah Solar White 80lb cardstock and layered it on the card base using my Lawn Fawn glue pen.  

The coloured images are from the Simply Celebrate stamp set, which I stamped in Momento Tuxedo Black ink (because it is Copic friendly).  Next, I coloured the images in rainbow colours with my Copic markers and die cut the images with the matching dies set.  I then popped the images up onto the card front using dimensional adhesive.


The last step was to stamp a sentiment, using Versafine Onyx Black ink, onto banner strips that I had cut and fish tailed by hand.  To keep the banners from blending into the background, I cut small pieces of cardstock that matched the card base and glued those pieces to the back of the banners.  The sentiment strips were then adhered to the card, also with dimensional adhesive.

I love the images in the Simply Celebrate set and very much look forward to making more cards using the holiday version!


Saturday, September 01, 2018

Balloon cards


Stenciling


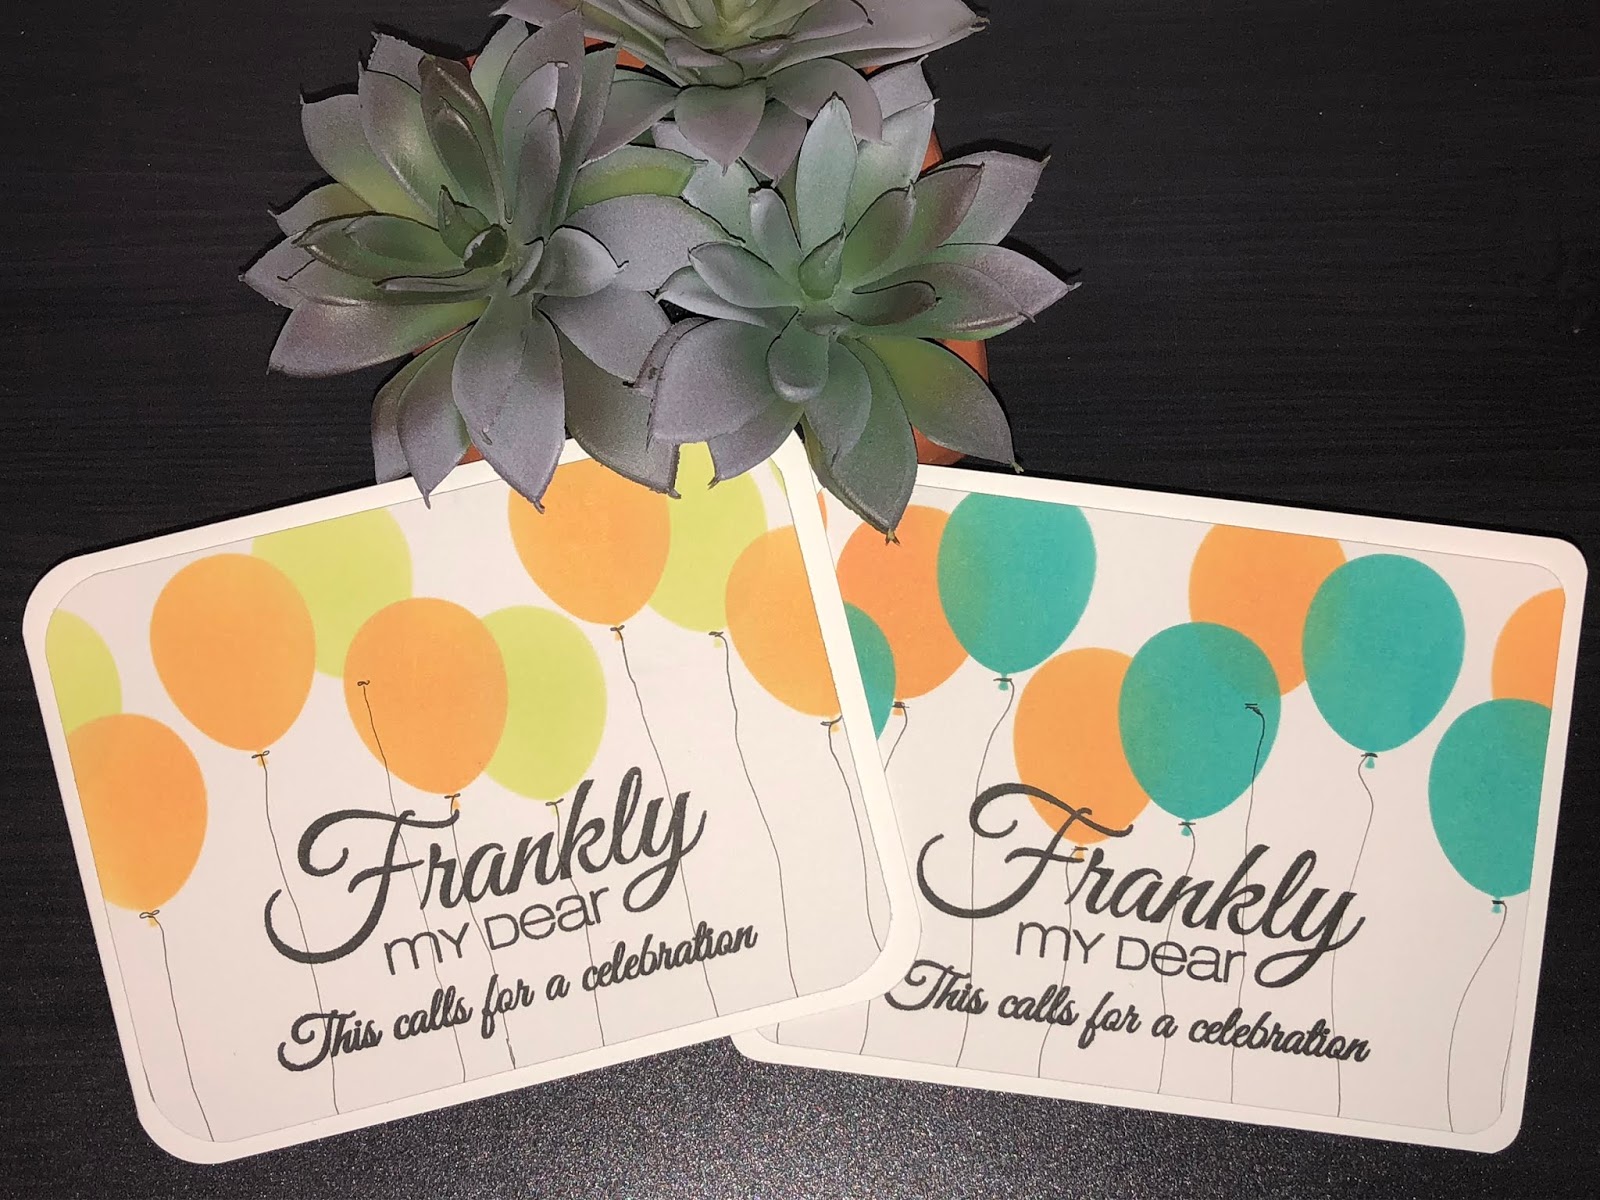
I used the Neat & Tangled Balloon Duo stencil to make some birthday cards.  


I used Strathmore Bristol paper so I could blend with Distress Oxide inks.  Two colours per card created a nice mix.  


I added balloon strings with a Copic Multiliner pen, added a sentiment from a variety of sources (Stamp of Approval, Concord & 9th), rounded the corners of the card panel and the card base with a corner chomper from We R Memory Keepers.


The last step was to pop the card panels up on 3M foam tape and add them to a card base.  I love how vibrant these simple cards can be.  This is one of my favourite stencil sets because it is easy and quick to use.  You can create beautiful birthday cards in minutes.