Showing posts with label Copic. Show all posts

Saturday, October 06, 2018

Interactive Reveal Wheel Halloween Card

Reveal Wheel Card

The Reveal Wheel die set by Lawn Fawn is simple and well designed.  I love that it is so easy to use.

I die cut two panels with the largest die in the set and used the pumpkin-shaped insert die to create the reveal wheel hole.  On the front panel I used paper from the Lawn Fawn Knit Picky Fall 6 x 6 paper pack, cut to the appropriate shape using the panel die.  The green paper is my "grass" and the orange paper is the "sky". I love everything about Lawn Fawn products, but how great is this paper?  The Pick of the Patch stamp set and matching dies are a great Halloween and fall-themed set that work perfectly with this interactive card die set.

I coloured the spinning wheel, inside the embossed line, with the same Copic markers that I used to colour the pumpkins.  Then I stamped several of the faces on the spinning wheel to show through the pumpkin-shaped image.  I coloured several squirrels and their accessories to include in my scene.  Putting the scene together was so much fun!

How great are the faces in this set!


Check out the great little details that Lawn Fawn puts in their die sets (that cute little arrow) and the stamp sets (that happy little squirrel and the lid for the pumpkin).  How can you not love Lawn Fawn?


Saturday, September 22, 2018

Clean and Simple Christmas Cards

Christmas Lights 

Colouring is therapeutic and fun.  I really enjoy it.  For this set of simple cards I stamped the Hero Arts Christmas Lights 6 x 6" background stamp on Neenah Solar White 80lb cardstock in Momento Tuxedo Black ink.  I chose this particular ink because it is Copic marker friendly.  Next, I chose markers in the red, green, blue and yellow families and sat down in front of the TV to colour.  I used two shades per colour, as the images are so small.


I tried to follow a pattern with my light colouring (red, blue, green, yellow), but I found the lights didn't line up perfectly for the pattern to work, so I added some purple lights in here and there to fill odd spots.  After the Copic colouring was finished, I added Wink Of Stella clear glitter pen highlighting to each bulb and touched up the base of each bulb with a silver Spica glitter pen. 

The 6 x 6 panel was large enough for me to cut into thirds and create three cards.  I adhered the coloured pattern to the left side of a side folding A2 card base, added a strip of red paper along the edge and stamped a holiday sentiment to the right of the red paper strip, near the bottom of the card.  The Christmas sentiments are from the Hero Arts Poster Christmas Carols stamp set, stamped in Versafine Onyx Black ink.

This card is in the same style, but the sentiment is from the Gina K Designs Christmas Greenery stamp set.

Saturday, September 01, 2018

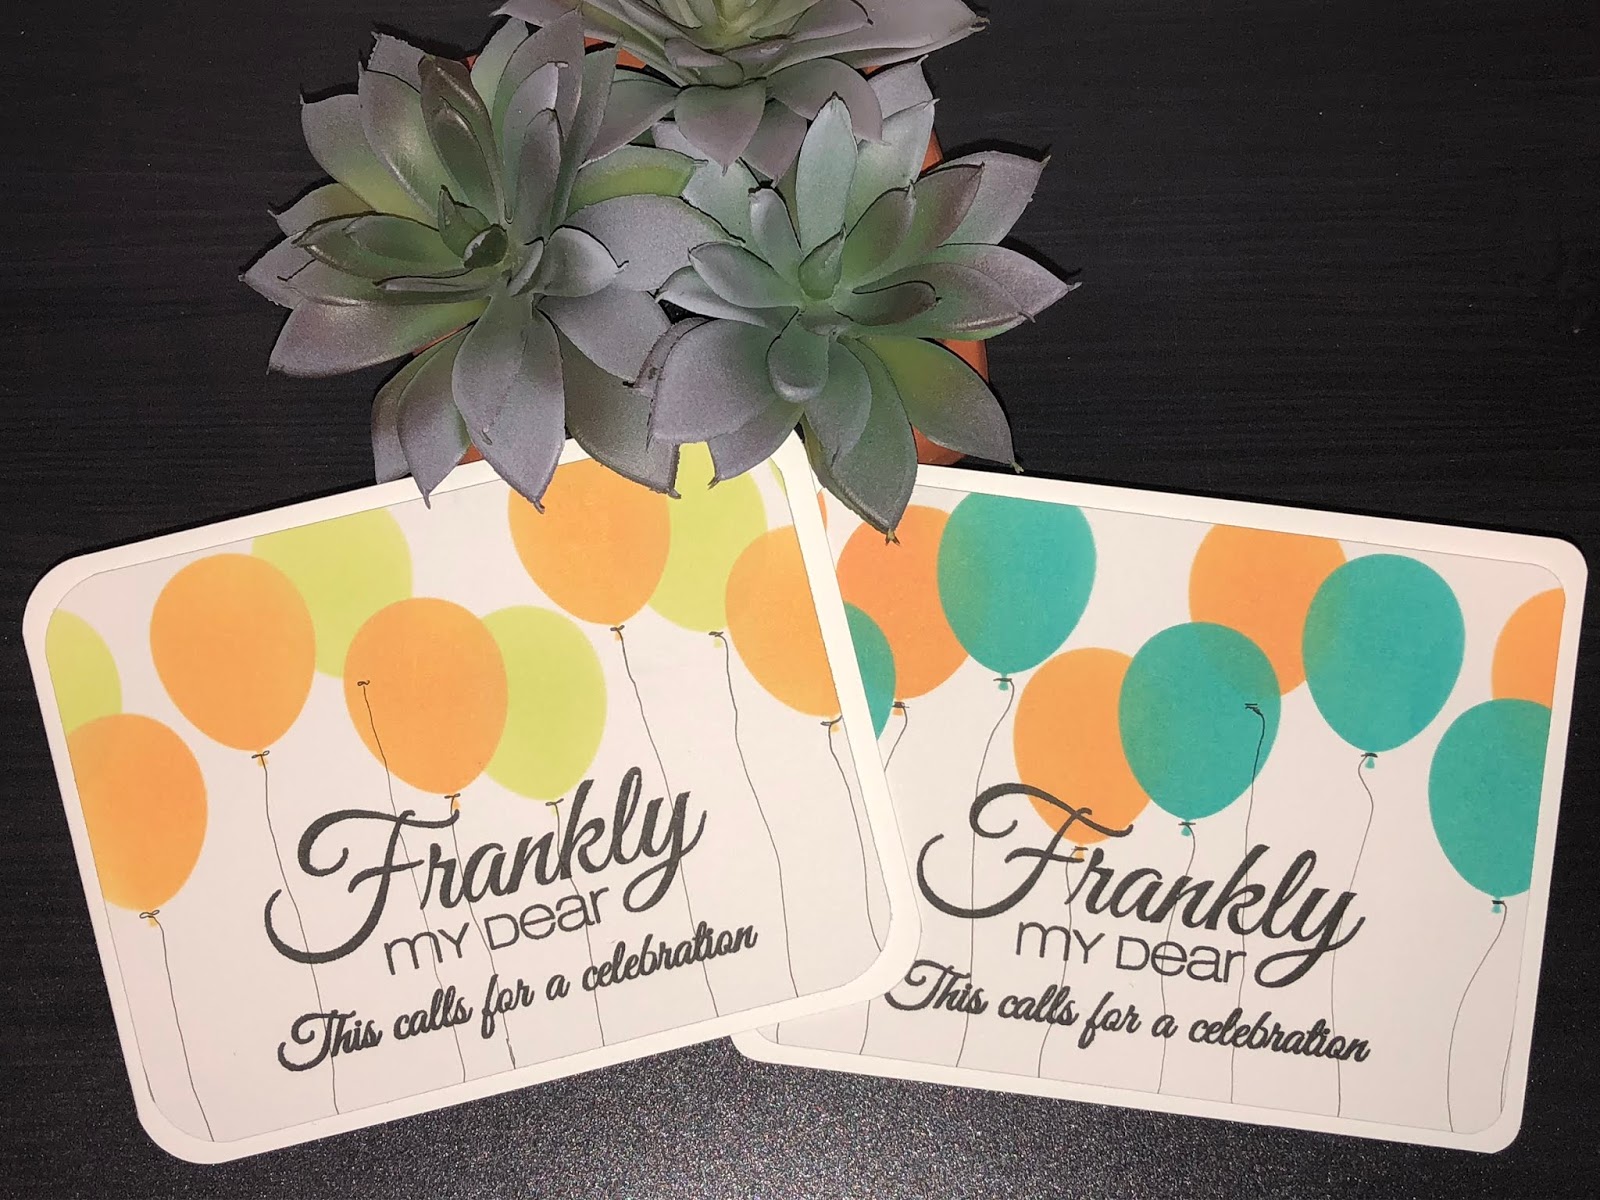
Balloon cards


Stenciling


I used the Neat & Tangled Balloon Duo stencil to make some birthday cards.  


I used Strathmore Bristol paper so I could blend with Distress Oxide inks.  Two colours per card created a nice mix.  


I added balloon strings with a Copic Multiliner pen, added a sentiment from a variety of sources (Stamp of Approval, Concord & 9th), rounded the corners of the card panel and the card base with a corner chomper from We R Memory Keepers.


The last step was to pop the card panels up on 3M foam tape and add them to a card base.  I love how vibrant these simple cards can be.  This is one of my favourite stencil sets because it is easy and quick to use.  You can create beautiful birthday cards in minutes.

Sunday, January 28, 2018

Cards for my nephew to give as gifts

My nephew is in grade one this year and two of his friends have moved away.  Both are big changes in his life.  I asked him if he would like me to make some cards to send to his friends and he liked that idea, so I am going to send him a set of cards with his Valentine's Day card.  Pictures and details of the cards are below.

Cute Birdies
I used the Concord & 9th Birdie Banners and Alpha Bits sets for both cards and, on the card on the right side, I added a tree from the Gina K. Designs set Friends 'til the End.  I stamped with a variety of Lawn Fawn inks and used Tim Holtz Ranger Distress Markers to draw the grass and colour the wings and tail on the birds.  The clouds were blended in using Distress Ink and the My Favorite Things mini clouds stencil.  The last step was to score a line around the edge of the front of the card.

Cute critter cards
These one-layer cards were made using the Gina K. Designs stamp set Friends 'til the End.  I stamped the images on the left card with Momento Tuxedo Black ink and coloured the images with Chameleon coloured pencils.  The card on the right was stamped using a combination of Lawn Fawn coloured inks and Momento Tuxedo Black ink.  The owl was coloured with coloured pencils and the grass was drawn in with a Ranger Distress marker.  I masked the owl with a trimmed post-it note and blended the clouds onto the card panel using Ranger Distress ink and the MFT mini cloud stencil.  The last step was, again, to score a line around the edge of the card.

Airplane cards
One of my nephew's interests is things that fly so I used this cute Lawn Fawn set, Plane and Simple, to stamp and die cut the images.  They were coloured with Copic markers and adhered to a card panel that was embossed using the Lawn Fawn Stitched Cloud Backdrop (Landscape) after being cut down to size with the second largest die from the Lawn Fawn 4-bar sized Stitched Rectangle Stackables.

Buzy Bees
The cute little bees from the Honey Bee stamp set Build-a-Bee set make me smile.  I hope they make my nephew smile, too.  I coloured the bees with Copic markers, embossed the coloured card panel with a Lifestyle Crafts embossing folder and used a sentiment on the inside from the Honey Bee Bee-You-Tiful Sentiments set.

Monster Truck cards
And, since he loves them, I had to make a couple of cards with monster trucks that he could send to his friends.  The notecard is a 4-bar sized Lawn Fawn card and the panel was cut with the second largest of the 4-bar sized Stitched Rectangle Stackables and embossed with the Stitched Cloud Backdrop (Portrait).  The grass and the label were also both Lawn Fawn dies. The trucks are from the Your Next Stamp set called "Got Mud?" and were coloured with Chameleon coloured pencils.


Saturday, January 27, 2018

Valentine Card for my nephew


I made a Valentine’s Day Card for my nephew using monster trucks, which he loves.  Your Next Stamp has the perfect stamp and die set:  Got Mud?  I stamped all three monster trucks in the set, coloured them with Copic markers and die cut them to layer on my card.

I wanted to make an interactive type of card, so I used the Lawn Fawn Hillside pop-up die.  To decorate the front of the card I started by cutting a white card panel with the largest Lawn Fawn Inside Out Rectangle die.  The Copic airbrush system created the look of a sky in the background.  I then embellished with the cloud and sun dies from the Lawn Fawn Spring Shower set to create a scene for one of the trucks.


On the inside of the card I used blue coloured cardstock for the sky, embellished with the same cloud and sun dies.  The grassy hillsides were cut using the Grassy Hillside borders add-on die that coordinates with the hillside pop-up die.  The sentiment is from Hero Arts and the mud splatter stamps are part of the YNS Got Mud? stamp set.  The last step was to use my Spectrum Noir clear sparkle pen to jazz up the clouds a bit.

Let’s hope he likes his card!