Showing posts with label Your Next Stamp. Show all posts

Monday, September 24, 2018

Sending Smiles

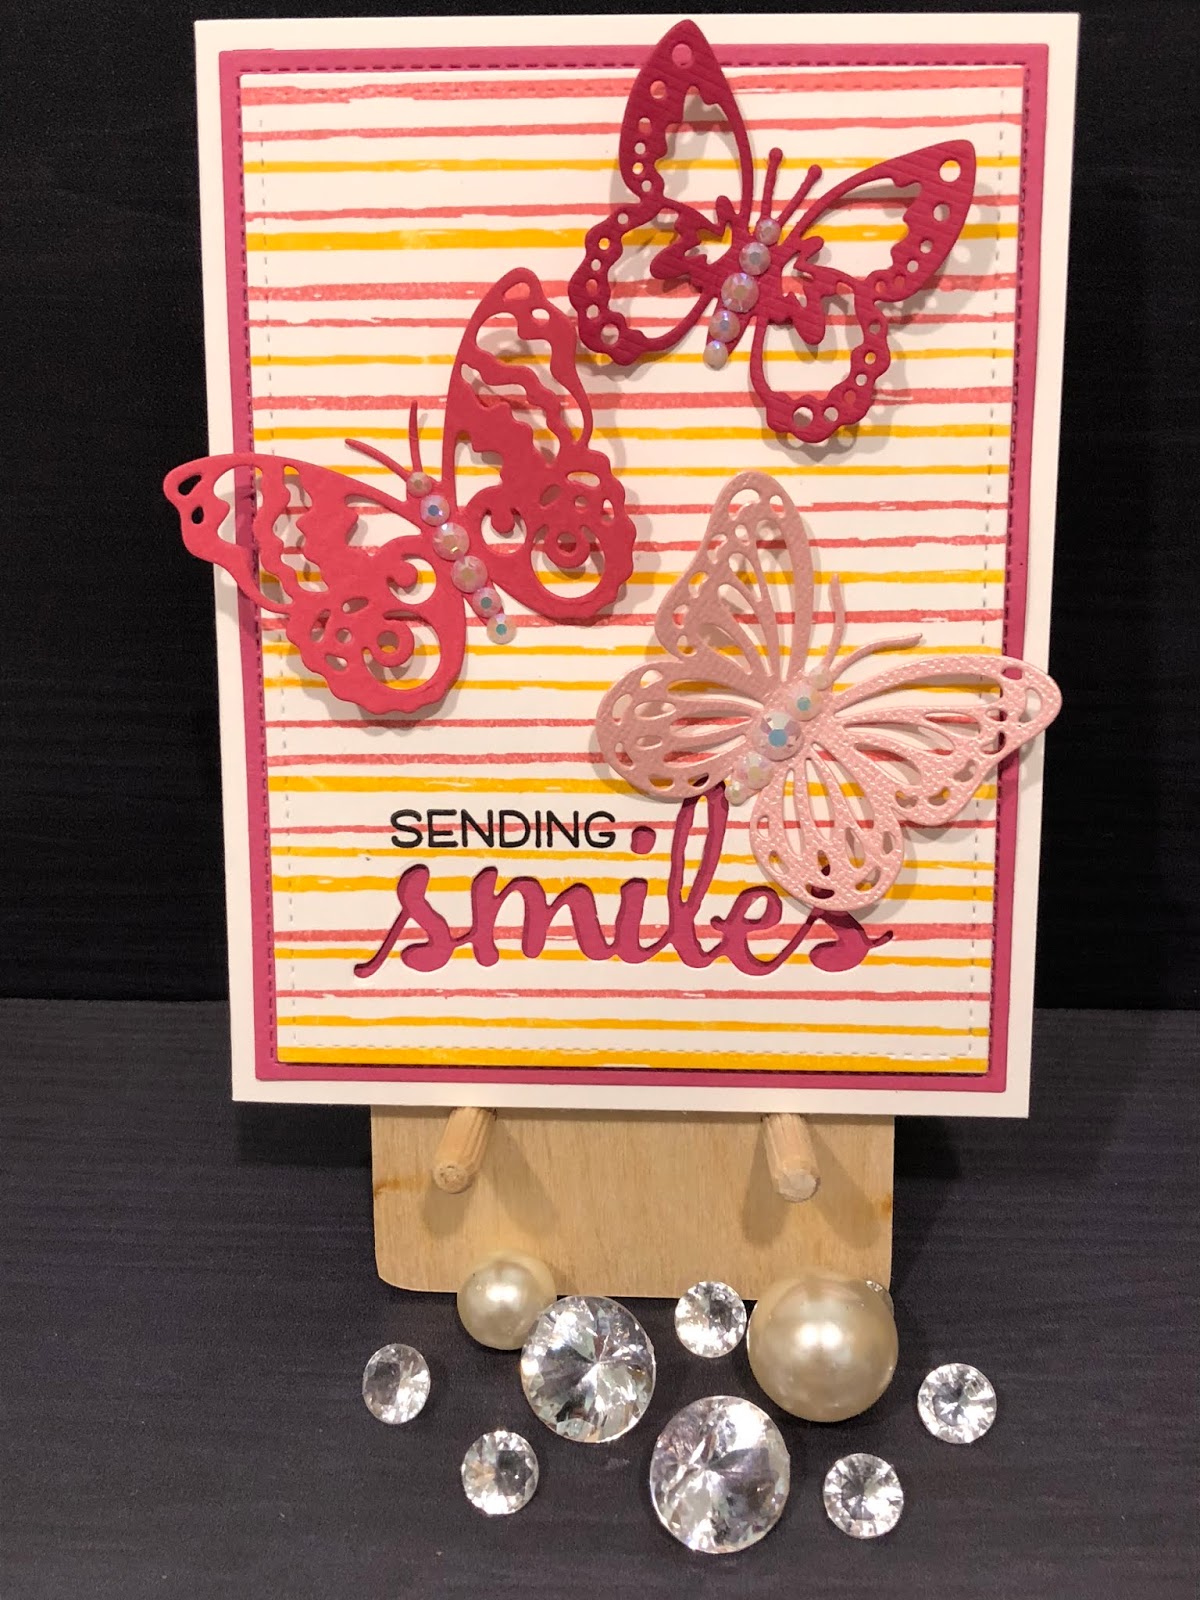
If you follow my Instagram account, you know that I love to save my scrap cardstock pieces and use them for die cutting images.  This card design provided another opportunity to use some of my scraps - this time, for butterflies.

 And, anyone who knows me is aware that I love the chance to add some bling.  To myself, to my cards, to my prop collection.  It's all good!

I started this card set using the Concord & 9th Sketched Stripes background stamp.  (I am in love with their background and turnabout stamp sets.)  I stamped the background stripes in two colours for each background to provide a bit of interest.
Once the backgrounds were stamped, I die cut them, and the coloured layering panels, to the sizes I wanted using the Lawn Fawn Stitched Rectangles Stackables (2nd largest die) and the Lawn Fawn Outside In Stitched Rectangles (largest die).  Then, I determined where I wanted the sentiment to be and die cut the "smiles" sentiment from each stamped background layer. 

 The sentiment die is from the Big, Bold, Friends set by Winnie & Walter.  I then stamped the "sending" sentiment above the die cut using Versafine Onyx Black ink.  This stamp is from the Lawn Fawn Happy Happy Happy stamp set.  The butterflies are from Sizzix and I added some gems from Lucy's Cards to the bodies of each butterfly.  It's hard to capture in the pictures, but the light catches nicely in the gems in person.
I used Neenah Solar White 80lb cardstock for both the stamped background panels and the A2 sized card bases.  The ink is by Catherine Pooler Designs (All That Jazz, Something Borrowed, Party Dress and Tiki Torch).  The coloured cardstock layering panels are Simon Says Stamp cardstock in Island Blue and Doll Pink.

I created a different version of the card using the same background stamp and cardstocks, but switching up the inks (Simon Says Stamp Clementine, Hot Mama, Sea Glass and Island Blue) and using the Island Blue cardstock as the base, instead of the white.  I also  changed the sentiment die to the Fancy Aloha die, by Your Next Stamp, and swapped the individual butterflies for a butterfly border (also by Your Next Stamp). 

The butterflies are die cut out of the stamped background and popped up, offset a bit to show the blue background cardstock.  Instead of die cutting the sentiment out of the background, I die cut it out of matching Island Blue cardstock, stacked several together and slightly offset them onto a black cardstock (Licorice by Lawn Fawn) die cut of the same die.  Next, I adhered the stacked die cut sentiment to the card and, as a final touch, I added Nuvo Crystal Glaze to the butterfly border, to subtly set it apart from the background.

Monday, September 10, 2018

Birthday Cards for Kids

A Variety of Card Styles and Colours

I am making some cards for my sister's stash.  My nephew is at the age where he attends quite a few birthday parties for his friends and I said that I would make some cards for him to have on hand.  I started by using some dies from the June 2018 Spellbinders monthly die subscription.  The set includes a candle and a cupcake with some flower embellishments.

Candles

I created the same version of this card several times, but added a different number of candles to the front of each thinking that the card could be used for a person the age of the number of candles on the card.

My scrap bin came in handy for making the candles for these cards.  I used my Momento Tuxedo Black marker to colour the wicks of the candles. 

I kept the cards fairly simple.  I used patterned paper on the base of each card from the Swirly Fun 6 x 6 paper pad (by Your Next Stamp).  The card bases are made from Neenah Solar White 80lb cardstock.  I popped the candles and flames up using foam squares and the sentiment is from the Altenew Birthday Builder stamp set.


Cupcakes

I made a couple of cupcake birthday cards in traditional masculine colours, blue and green.  Of course, there had to be a candle on the cupcake for a birthday card.

I like that the dies have embossing detail in them.  In order to take advantage of this option, after die cutting the image you run the die cut image through the machine again,  using an embossing mat instead of the bottom cutting plate.  The pressure from the machine essentially squishes the paper into the embossing areas on the die and you wind up with an embossed pattern.  Easy peasy.

You'll notice that there are embossing line details on the cupcake wrapper, swirls in the cupcake icing and (although it is hard to see) curved line details in the candle and the flame.  The embossing creates extra dimension in the images.  Next time, I think I'll blend a bit of distress ink over the images to make the embossing lines more visible.  


I created a second version of the card using traditionally feminine colours.  This is the same design as the masculine version, but I added the decorative flowers to the pink and red(ish) versions of the card.  The flowers also have embossing detail, which adds to the image.

Again, I used patterned paper from the Swirly Fun paper pack by YNS.

Sunday, January 28, 2018

Cards for my nephew to give as gifts

My nephew is in grade one this year and two of his friends have moved away.  Both are big changes in his life.  I asked him if he would like me to make some cards to send to his friends and he liked that idea, so I am going to send him a set of cards with his Valentine's Day card.  Pictures and details of the cards are below.

Cute Birdies
I used the Concord & 9th Birdie Banners and Alpha Bits sets for both cards and, on the card on the right side, I added a tree from the Gina K. Designs set Friends 'til the End.  I stamped with a variety of Lawn Fawn inks and used Tim Holtz Ranger Distress Markers to draw the grass and colour the wings and tail on the birds.  The clouds were blended in using Distress Ink and the My Favorite Things mini clouds stencil.  The last step was to score a line around the edge of the front of the card.

Cute critter cards
These one-layer cards were made using the Gina K. Designs stamp set Friends 'til the End.  I stamped the images on the left card with Momento Tuxedo Black ink and coloured the images with Chameleon coloured pencils.  The card on the right was stamped using a combination of Lawn Fawn coloured inks and Momento Tuxedo Black ink.  The owl was coloured with coloured pencils and the grass was drawn in with a Ranger Distress marker.  I masked the owl with a trimmed post-it note and blended the clouds onto the card panel using Ranger Distress ink and the MFT mini cloud stencil.  The last step was, again, to score a line around the edge of the card.

Airplane cards
One of my nephew's interests is things that fly so I used this cute Lawn Fawn set, Plane and Simple, to stamp and die cut the images.  They were coloured with Copic markers and adhered to a card panel that was embossed using the Lawn Fawn Stitched Cloud Backdrop (Landscape) after being cut down to size with the second largest die from the Lawn Fawn 4-bar sized Stitched Rectangle Stackables.

Buzy Bees
The cute little bees from the Honey Bee stamp set Build-a-Bee set make me smile.  I hope they make my nephew smile, too.  I coloured the bees with Copic markers, embossed the coloured card panel with a Lifestyle Crafts embossing folder and used a sentiment on the inside from the Honey Bee Bee-You-Tiful Sentiments set.

Monster Truck cards
And, since he loves them, I had to make a couple of cards with monster trucks that he could send to his friends.  The notecard is a 4-bar sized Lawn Fawn card and the panel was cut with the second largest of the 4-bar sized Stitched Rectangle Stackables and embossed with the Stitched Cloud Backdrop (Portrait).  The grass and the label were also both Lawn Fawn dies. The trucks are from the Your Next Stamp set called "Got Mud?" and were coloured with Chameleon coloured pencils.


Saturday, January 27, 2018

Valentine Card for my nephew


I made a Valentine’s Day Card for my nephew using monster trucks, which he loves.  Your Next Stamp has the perfect stamp and die set:  Got Mud?  I stamped all three monster trucks in the set, coloured them with Copic markers and die cut them to layer on my card.

I wanted to make an interactive type of card, so I used the Lawn Fawn Hillside pop-up die.  To decorate the front of the card I started by cutting a white card panel with the largest Lawn Fawn Inside Out Rectangle die.  The Copic airbrush system created the look of a sky in the background.  I then embellished with the cloud and sun dies from the Lawn Fawn Spring Shower set to create a scene for one of the trucks.


On the inside of the card I used blue coloured cardstock for the sky, embellished with the same cloud and sun dies.  The grassy hillsides were cut using the Grassy Hillside borders add-on die that coordinates with the hillside pop-up die.  The sentiment is from Hero Arts and the mud splatter stamps are part of the YNS Got Mud? stamp set.  The last step was to use my Spectrum Noir clear sparkle pen to jazz up the clouds a bit.

Let’s hope he likes his card!