Showing posts with label Catherine Pooler Designs Ink. Show all posts

Monday, June 24, 2019

Set of Square Greeting Cards

Greeting Card Set

Set of four greeting cards available for purchase in my Etsy shop.  The set includes two birthday cards, a thank you card and a sympathy card.  I created a set in each of six colours:  yellow, green, teal, coral, purple and blue.  The colour selections are shown below.


I also include an envelope for each in the card set and I've adorned each with a matching stamped image (shown below).


The card to the left shows the blue background option.
 The green option is shown to the right.
A bright yellow version is also available.
As is a purple background.

Saturday, June 22, 2019

Greeting Card Set

Set of Four Greeting Cards


I have started an Etsy shop to sell my cards and I have slowly been stocking it up.

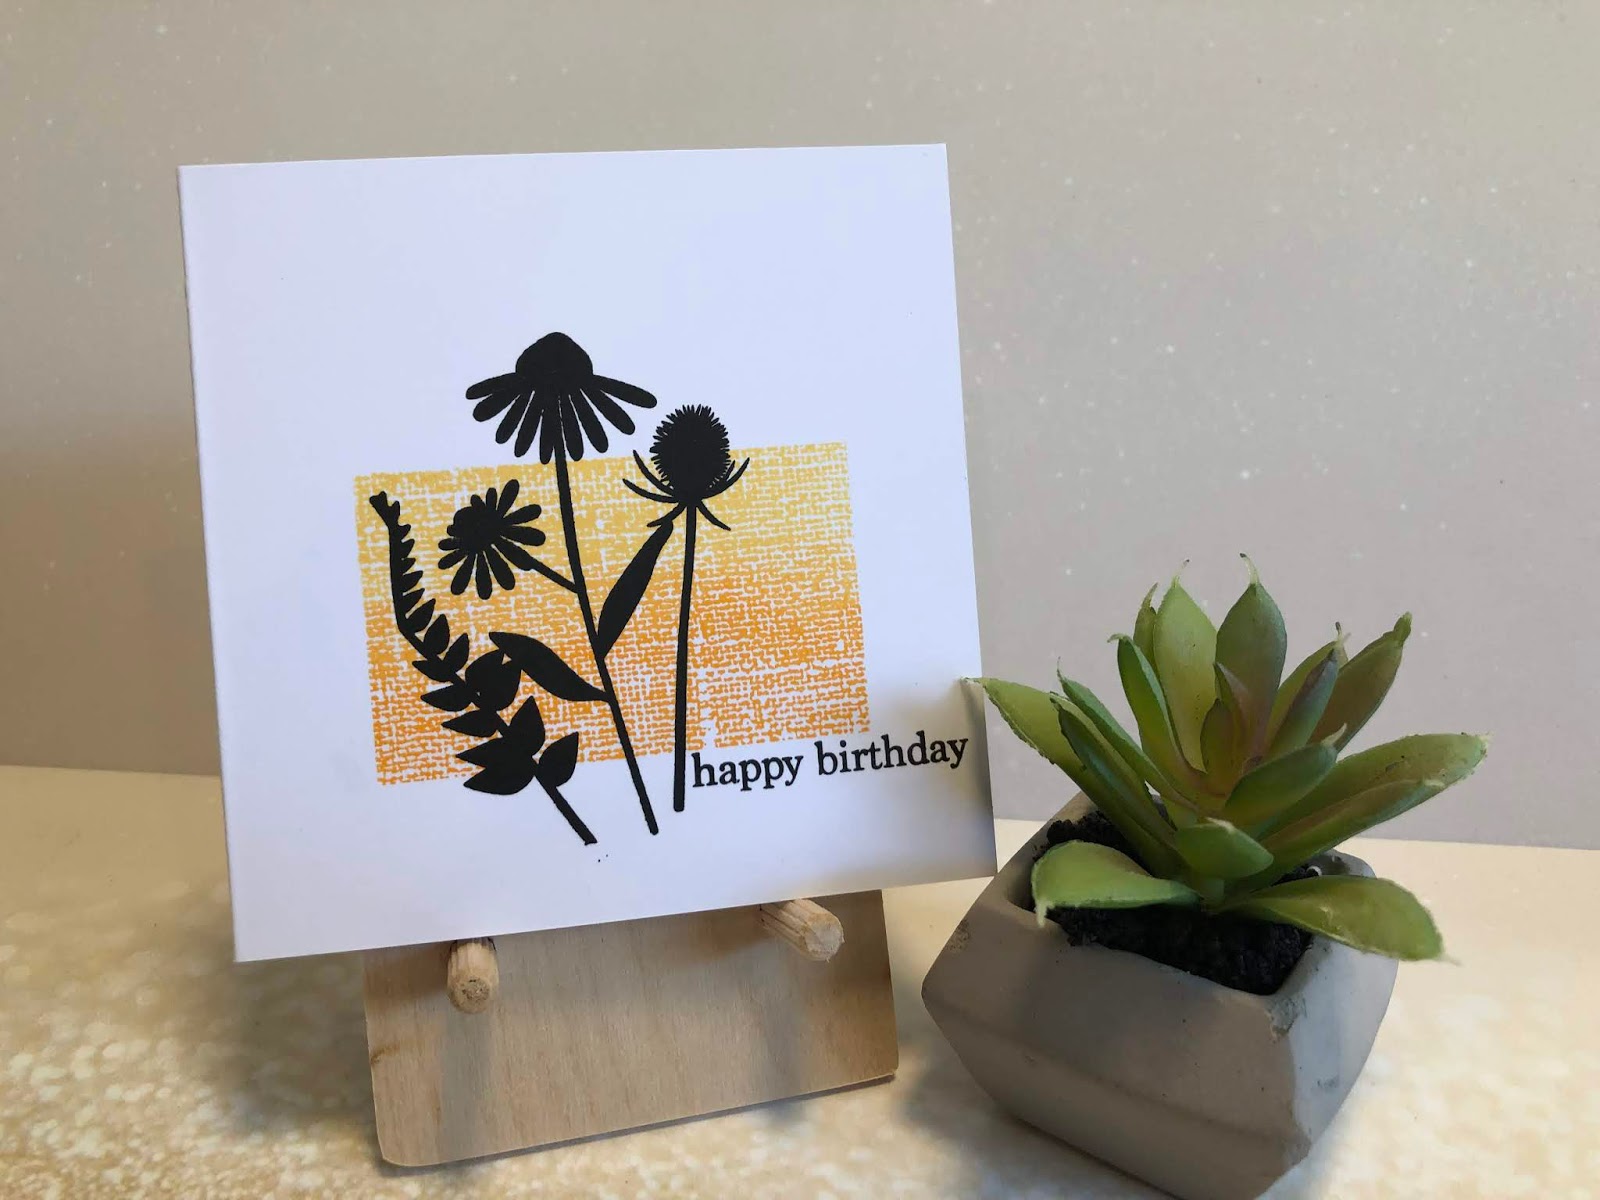
This is one of four cards included in a set of four cards that I have added to my shop as a set.  This set is A2 sized and includes two birthday cards, a thank you card and a friendship card.

The coloured background is a patterned stamp from the Background Textures stamp set that is part of the Club Sursee monthly subscription kit from Catherine Pooler Designs.


Above is a photo of the green version of the set of four cards.  Each set has cards with matching backgrounds and black silhouette images.  Below are other colours of backgrounds that are also available.

To the left is the blue version. The background stamp was stamped with Catherine Pooler Designs inks in two shades.  The sentiment stamp and the floral and foliage images were stamped with Versafine Onyx Black ink for a crisp silhouette.
 To the right is a coral coloured version.
 Purple is also lovely in this design.
The teal is my favourite version.  It reminds me of the Caribbean.

Monday, October 08, 2018

Clean and Simple Bithday Card

Using Christmas Themed Items for Other Purposes

The new Concord & 9th Christmas release is incredible, as their holiday releases always are.  But, I needed a birthday card fairly quickly and this release had just arrived in my mailbox.  So, here’s my take on a birthday card using images and dies from Christmas-themed sets.

I started by taking a short “diamond” border die and placing it in my MISTI.  Each time that I changed colours, I moved the card panel upward half an inch which gave me an even distribution over the panel. 


I decided to use a rainbow colour palate of Catherine Pooler Designs inks to make a bright background the star of the show.

Once the stamped panel was complete, I die cut it using the largest sized die in the Small Rectangle Stackable dies.  I then cut a scrap of Bazzil Bling cardstock, to place behind the stamped panel, in blue for the full sized card front panel.  I used the A2 sized Rectangle Stitched Stackable die from Lawn Fawn’s large set of rectangle stackable dies to match the pattern on both panels.  Next, I die cut the Holly Jolly banner die from a scrap of dark pink Bazzil Bling cardstock and stamped the Happy Birthday sentiment using Versafine Onyx Black ink.  I had to stamp the sentiment more than once because the cardstock was textured.  My MISTI is one of my favourite cardmaking tools, and this is why - it makes cardmaking so much easier.


I adhered the banner using three layers of 3M foam tape, for the popped-up section, and Lawn Fawn glue tube for the base parts that attach to the card.


The sentiments are from the Reverse Confetti Birthday Wishes stamp set.  I used the "So Many Candles.  So Little Cake" on the inside.

Saturday, October 06, 2018

Halloween Shadow Box Tunnel Card

Ghosts, Bats and a Black Cat

The Spellbinders Large and Small Die-of-the-Month Kits for September 2018 had a Halloween theme.  Yay!  I used the dies from the Small Die set, along with others in my stash, to create this card.


All of the panels for the card are ink blended using Distress Oxide inks in Seedless Preserves, Dusty Concord and Black Soot.  They were then given some texture using water, a Distress Sprayer and a paper towel to blot the sprayed water.  On the front of the card, the bats and the ghosts are from the Spellbinders Small Die set.  The fence is a die from a recent release from Lawn Fawn.  The spider, spider web and the sentiment are stamps from the Everything But the Broom stamp set by Catherine Pooler Designs.


In this close-up of the inside you can see the layers in the box card.  On the layers I added die cut embellishments, including the sentiment, from the Spellbinders Small Die set.  I tucked the spooky cat between the fences and added the cute little ghost to the side of the panel to make it look like he's peeking out.  The tree and headstone images on the back panel were stamped using Midnight ink from Catherine Pooler Designs.  I used two sizes of circle punch by Stampin' Up! to cut the moon out of gold glitter paper from the Lawn Fawn Autumn Glitter Paper collection - after the larger circle was cut, I used the smaller circle to cut the crescent shape.  It took a couple of tries to get the look I wanted.


Isn't he a cute and happy looking ghost?  That's why I like him so much!


Above is a panned out view of the card.  Notice that I added the ornate skull-topped piece to the top of the card.  I wanted it to look like the entrance to the graveyard.

Wednesday, September 26, 2018

Tropically Yours Stamp of Approval Collection

Tropical Cards

I love everything tropical - the foliage, the birds, the animals, the colourful water and the humidity.  When I heard the theme for this Stamp of Approval collection (by Catherine Pooler Designs), was Tropically Yours, I was sold.  It falls squarely in my wheelhouse.  The stamp sets are so fun and so well coordinated - they work wonderfully together.  I just had to get inky! (And I took this collection on vacation so I wouldn't have to wait. 😉😊😇)
I used a variety of stamp sets on this card, starting with the Grunge Background, which I stamped in Coral Cabana ink (Catherine Pooler Designs).  I stamped the leaves from the Leave Me In Paradise set using green ink from Gina K Designs (because I could take the ink cubes with me!).  I stamped a variety of border stamps from the Good Vibes border stamp set, using brown ink (also GKD).  Of course, I had to add some tufts of grass and a border underneath the flamingo, so he would have a place to stand.  I used the Coral Cabana ink pad and the direct-to-paper technique to create some flamingo coloured paper, then stamped and die cut the flamingo from the Stand Tall stamp set.  And, flamingos (at least in my world) love bling, so I added some Nuvo Clear Sparkle pen over the entire die cut.  After it dried, I popped it up on the card with some dimensional adhesive and added my sentiment (also from the Stand Tall stamp set).  The final touch was to add some iridescent gems on the flamingo's path and in the top palm leaf.

I stamped a frame of tropical leaves in Jelly Bean, Grass and Fresh Asparagus green inks by Gina K Designs for the next card.  Then I added several small flower accents in Coral Cabana (Catherine Pooler Designs) and a lovely bright yellow (Wild Dandelion by Gina K Designs).  I stamped the sentiment, from Leave Me in Paradise, and added some iridescent gems to the centres of the small flowers.  The last step was to stamp the hibiscus flowers in Coral Cabana and the stamen in Wild Dandelion before adding Nuvo Clear Glitter pen to them.  Once they were dry, I popped them up on the card panel and added the panel to an A2 size card base.  

The next card is a similar design, but I used the leaves from Tropically Yours and stamped them over the entire background panel.  Then, I used a border stamp to provide a grounding for the hibiscus flowers and added a sentiment from the Stand Tall set to finish it off.  I used the same ink colours as for the card above, except I added Coral Reef (GKD) for the centre hibiscus.

Geometric Themed cards

The tropical style is not for everyone. This collection includes some geometric dies that are to die for!  I saw a card by Iliana Crouse that was incredible and I had to make a variation of it.  As I was on vacation I did not have coloured cardstock with me, so I made my own using my ink cubes, Coral Cabana ink pad and some Neenah Solar White 80lb cardstock.  Then, I die cut a bunch of pieces from my handmade coloured cardstock and started adhering them to my card panel.  Each hexagon has three separate pieces.

I stamped the sentiment and border stamps from the Stand Tall stamp set on a square of cardstock that I had coloured with Coral Cabana ink, but it didn't stand out enough from the card front.  My solution was to create a slate coloured geometric border on a strip of of white cardstock and adhere that behind the sentiment panel.  The finishing touch was to add gemstones to the centre of each hexagon stack.

I just couldn't leave the hexagon dies alone and had to make another card.  I used the same direct-to-paper technique with my ink pads to create coloured cardstock, then die cut my hexagons and traded the inner pieces of the die cuts with the outer frames of another colour.  It was a little time consuming, but I like the result.  I added a border along the bottom because there was too much white space for my taste and then I simply had to add a sentiment to finish the card.

I am a huge fan of the Stamp of Approval sets because they make it easy for my to coordinate stamp sets and dies.  This is definitely one of my favourite collections.

Monday, September 24, 2018

Sending Smiles

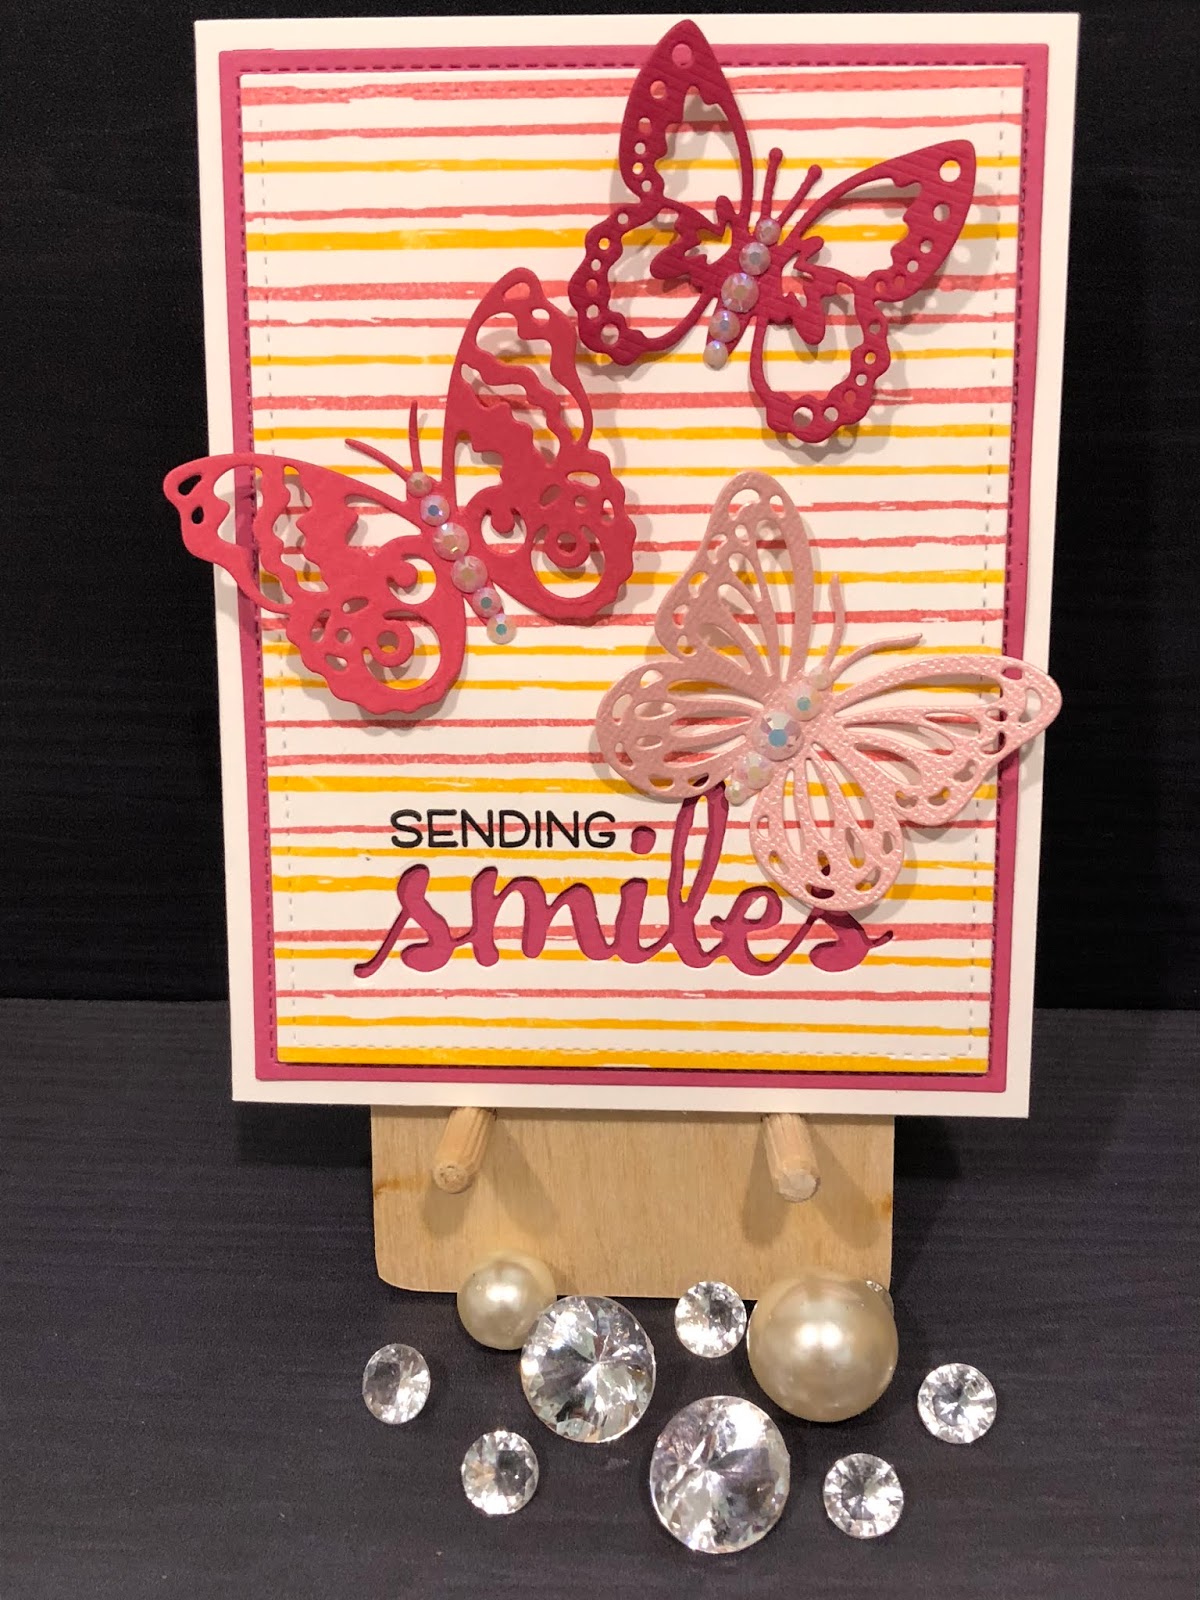
If you follow my Instagram account, you know that I love to save my scrap cardstock pieces and use them for die cutting images.  This card design provided another opportunity to use some of my scraps - this time, for butterflies.

 And, anyone who knows me is aware that I love the chance to add some bling.  To myself, to my cards, to my prop collection.  It's all good!

I started this card set using the Concord & 9th Sketched Stripes background stamp.  (I am in love with their background and turnabout stamp sets.)  I stamped the background stripes in two colours for each background to provide a bit of interest.
Once the backgrounds were stamped, I die cut them, and the coloured layering panels, to the sizes I wanted using the Lawn Fawn Stitched Rectangles Stackables (2nd largest die) and the Lawn Fawn Outside In Stitched Rectangles (largest die).  Then, I determined where I wanted the sentiment to be and die cut the "smiles" sentiment from each stamped background layer. 

 The sentiment die is from the Big, Bold, Friends set by Winnie & Walter.  I then stamped the "sending" sentiment above the die cut using Versafine Onyx Black ink.  This stamp is from the Lawn Fawn Happy Happy Happy stamp set.  The butterflies are from Sizzix and I added some gems from Lucy's Cards to the bodies of each butterfly.  It's hard to capture in the pictures, but the light catches nicely in the gems in person.
I used Neenah Solar White 80lb cardstock for both the stamped background panels and the A2 sized card bases.  The ink is by Catherine Pooler Designs (All That Jazz, Something Borrowed, Party Dress and Tiki Torch).  The coloured cardstock layering panels are Simon Says Stamp cardstock in Island Blue and Doll Pink.

I created a different version of the card using the same background stamp and cardstocks, but switching up the inks (Simon Says Stamp Clementine, Hot Mama, Sea Glass and Island Blue) and using the Island Blue cardstock as the base, instead of the white.  I also  changed the sentiment die to the Fancy Aloha die, by Your Next Stamp, and swapped the individual butterflies for a butterfly border (also by Your Next Stamp). 

The butterflies are die cut out of the stamped background and popped up, offset a bit to show the blue background cardstock.  Instead of die cutting the sentiment out of the background, I die cut it out of matching Island Blue cardstock, stacked several together and slightly offset them onto a black cardstock (Licorice by Lawn Fawn) die cut of the same die.  Next, I adhered the stacked die cut sentiment to the card and, as a final touch, I added Nuvo Crystal Glaze to the butterfly border, to subtly set it apart from the background.

Thursday, August 30, 2018

Simple birthday cards

Birthday cards are always good to have in your stash, so I made a few.  I used the Young at Heart stamp set and dies from one of the Stamp of Approval collections to create a colourful card front.  


I masked off a strip on the card front for the sentiment and stamped a pattern around with the circle stamps using Catherine Pooler Designs inks.  I added an embossed line on each side of the sentiment strip and used the fine tip of a Tim Holtz distress marker to trace either side of the embossed line.  


The last step was to add a die cut sentiment on the card front and a stamped sentiment on the inside.