Showing posts with label Simon Says Stamp. Show all posts

Sunday, September 30, 2018

Pocket Scrapbooking Cards

Camping Theme

Have you ever thought of making your own pocket scrapbooking cards?  I have a lot that I've purchased, but sometimes they just aren't exactly what I want for my layout.  I don't know why I didn't think of this earlier, but I've started making some of my own cards.  I have a ton of great background stamps, camping stamps and stencils that I can use for this purpose.  And, I have the Lawn Fawn dies for pocket scrapbooking - they create the perfect size of card, both large and small.  All you have to do is die cut, stamp, stencil and embellish.

For this set of cards I used Warm Cocoa ink by Gina K Designs to stamp the MFT In the Wilderness background stamp on Gina K Designs' Fresh Asparagus cardstock.  I added accents on the larger cards with a strip of Kraft cardstock, also by Gina K Designs.  When I'm ready to use the cards, I can add a sentiment or short description to that section.

Same design and cardstocks (in reverse) for this set, but I used dark green ink to stamp the SSS Tree Background stamp on the Kraft cardstock.  It seemed appropriate for trees.

For this set, I used the Holiday Foliage stencil from Newton's Nook as the pattern and applied green and brown distress inks, using a sponge dauber, to the leaves and pine cones.  The cardstock for the base is Kraft by Gina K Designs and the large card is accented with Dark Chocolate cardstock cut with the Forest Border Lawn Fawn die.

The cardstock base in this set is Honey Mustard (GKD) and I used  Tim Holtz Mini Stencil 32 with blending ink to create the tree pattern.  As I have the mini stencil, I had to overlap and repeat my blending several times on the larger cards to fill the entire panel.

In each set I tried to make vertical and horizontal cards in both the 4 X 6 and 2 X 3 sizes.  Some sets I used both sides of the card and made a vertical pattern on one side and a horizontal pattern on the other.  This way, the cards will fit with whatever layout style I choose.
Another tree-based set of cards using the MFT In the Woods stencil, distress ink blending and Honey Mustard (GKD) cardstock.
These background stamps by Impression Obsession, called "Rocks" and "Stones", create very realistic backgrounds.  These will be great for layouts of camping trips where we take the puppies down to the river.  I love the detail in these stamps.
This is a great stamp by So Suzy Stamps ("Hammock") and I thought it would be fun to incorporate into my scrapbook.  My husband and I received hammocks for Christmas one year and we use them for reading and relaxing while we are camping, so this stamp is perfect!  Again, a vertical and a horizontal version.  Simple cards with only the stamp, in Versafine Onyx Black ink, on plain Gina K Designs Kraft cardstock.

Friday, September 28, 2018

Colouring with Prismacolor Pencils on Dark Cardstock

Dark cardstock presents an interesting tapestry for colouring and the Kaleidoscope Centre Cut background by Simon Says Stamp is a beautiful stamp for colouring.  I embossed the entire stamp image (centre cut piece kept in) with silver embossing powder, because I wanted to try colouring with Prismacolor pencils.  I used multiple colours on the pattern, but I left quite a bit of black to show off the colouring and the colour of the sentiment.  I used purple, green and blue on this background.  The sentiment is from the Altenew Halftone Hello stamp set (I also used the matching die).  I stamped "hello" in a matching purple colour and the rest of the sentiment was white heat embossed on a strip of black cardstock (Licorice by Lawn Fawn).

This version is the same, except I used blues with a little blue-green for accent.
This one has white pencil colouring and a green sentiment.

I think the purple one is my favourite.

Monday, September 24, 2018

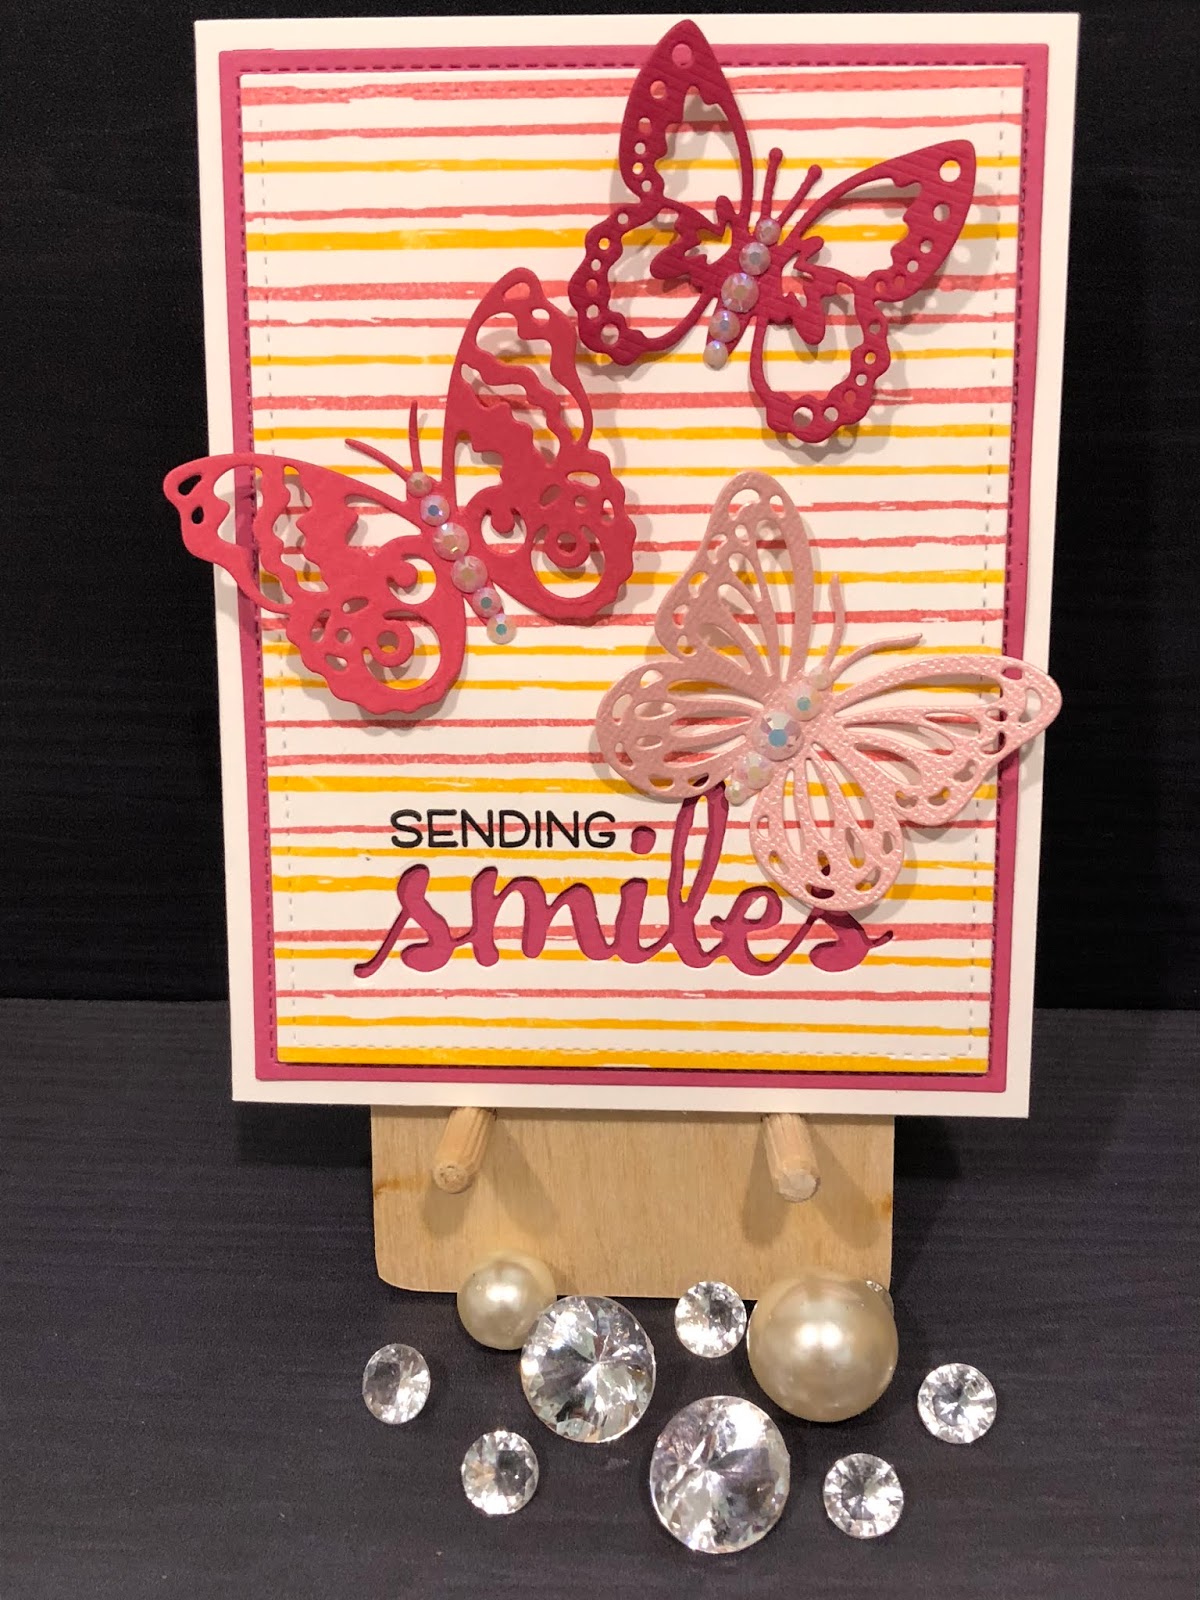
Sending Smiles

If you follow my Instagram account, you know that I love to save my scrap cardstock pieces and use them for die cutting images.  This card design provided another opportunity to use some of my scraps - this time, for butterflies.

 And, anyone who knows me is aware that I love the chance to add some bling.  To myself, to my cards, to my prop collection.  It's all good!

I started this card set using the Concord & 9th Sketched Stripes background stamp.  (I am in love with their background and turnabout stamp sets.)  I stamped the background stripes in two colours for each background to provide a bit of interest.
Once the backgrounds were stamped, I die cut them, and the coloured layering panels, to the sizes I wanted using the Lawn Fawn Stitched Rectangles Stackables (2nd largest die) and the Lawn Fawn Outside In Stitched Rectangles (largest die).  Then, I determined where I wanted the sentiment to be and die cut the "smiles" sentiment from each stamped background layer. 

 The sentiment die is from the Big, Bold, Friends set by Winnie & Walter.  I then stamped the "sending" sentiment above the die cut using Versafine Onyx Black ink.  This stamp is from the Lawn Fawn Happy Happy Happy stamp set.  The butterflies are from Sizzix and I added some gems from Lucy's Cards to the bodies of each butterfly.  It's hard to capture in the pictures, but the light catches nicely in the gems in person.
I used Neenah Solar White 80lb cardstock for both the stamped background panels and the A2 sized card bases.  The ink is by Catherine Pooler Designs (All That Jazz, Something Borrowed, Party Dress and Tiki Torch).  The coloured cardstock layering panels are Simon Says Stamp cardstock in Island Blue and Doll Pink.

I created a different version of the card using the same background stamp and cardstocks, but switching up the inks (Simon Says Stamp Clementine, Hot Mama, Sea Glass and Island Blue) and using the Island Blue cardstock as the base, instead of the white.  I also  changed the sentiment die to the Fancy Aloha die, by Your Next Stamp, and swapped the individual butterflies for a butterfly border (also by Your Next Stamp). 

The butterflies are die cut out of the stamped background and popped up, offset a bit to show the blue background cardstock.  Instead of die cutting the sentiment out of the background, I die cut it out of matching Island Blue cardstock, stacked several together and slightly offset them onto a black cardstock (Licorice by Lawn Fawn) die cut of the same die.  Next, I adhered the stacked die cut sentiment to the card and, as a final touch, I added Nuvo Crystal Glaze to the butterfly border, to subtly set it apart from the background.

Tuesday, September 18, 2018

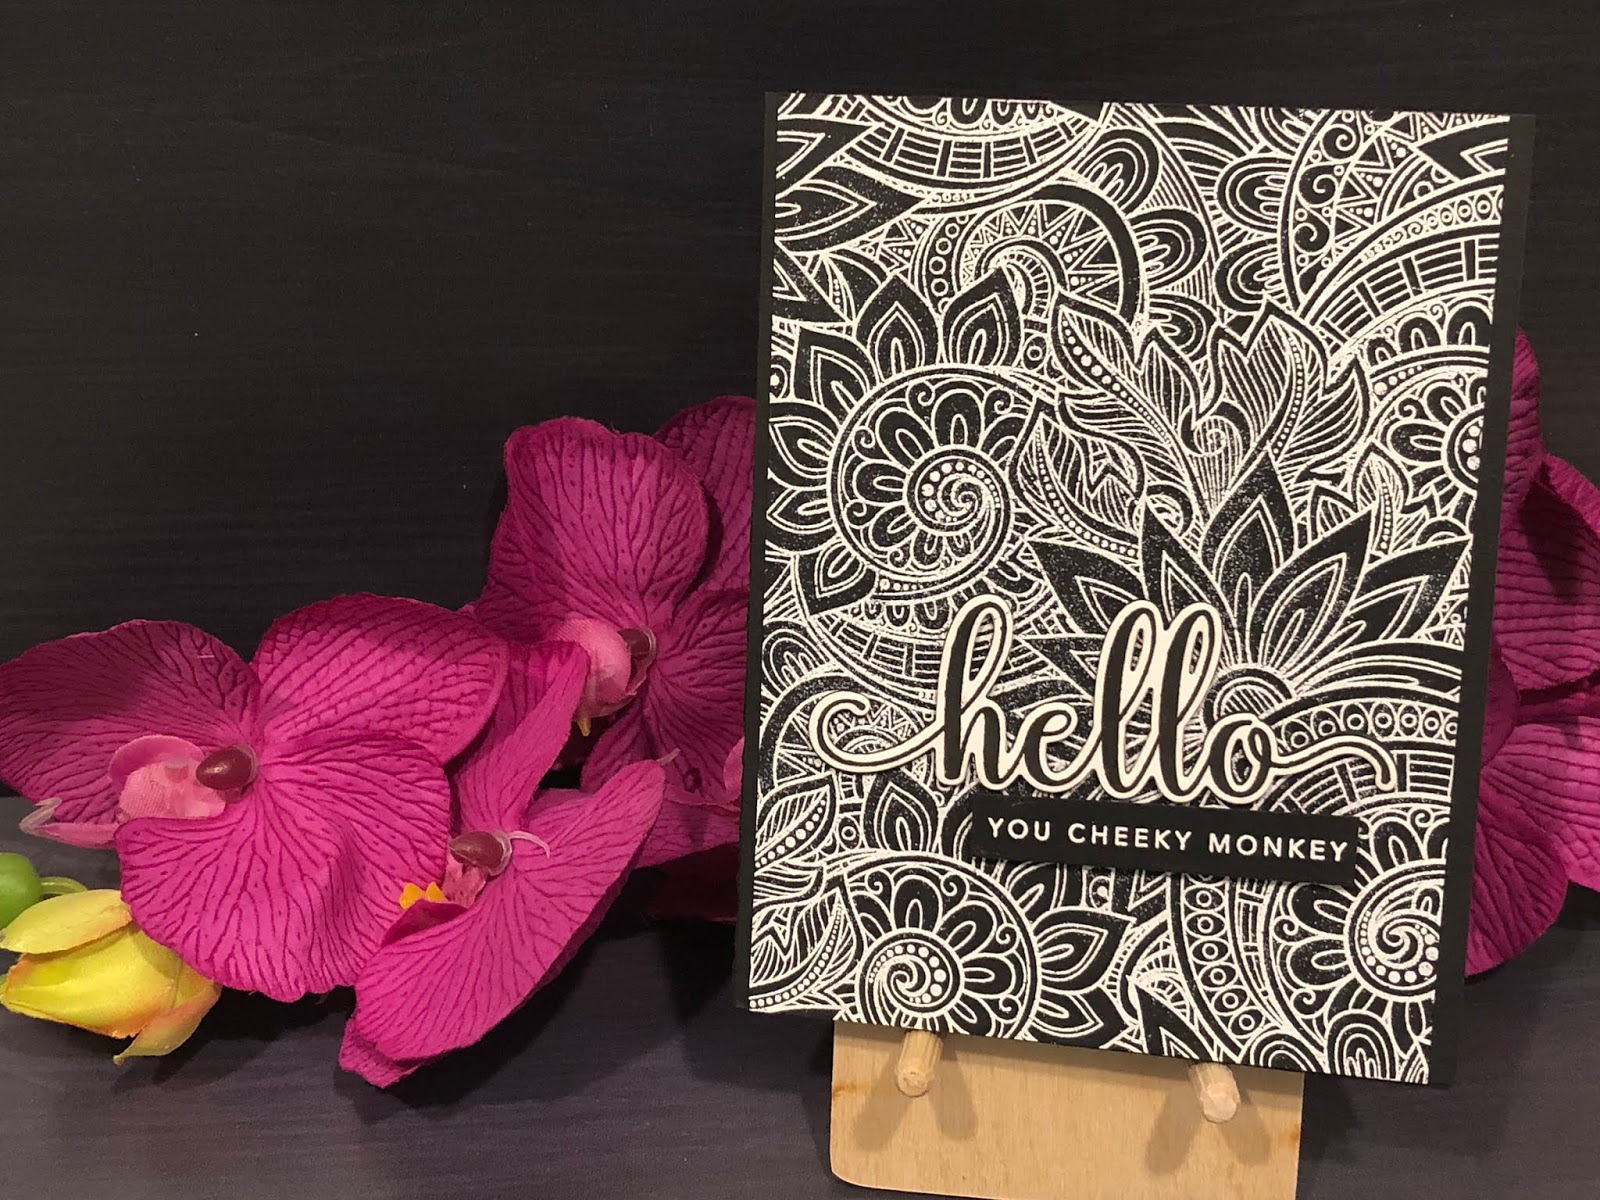
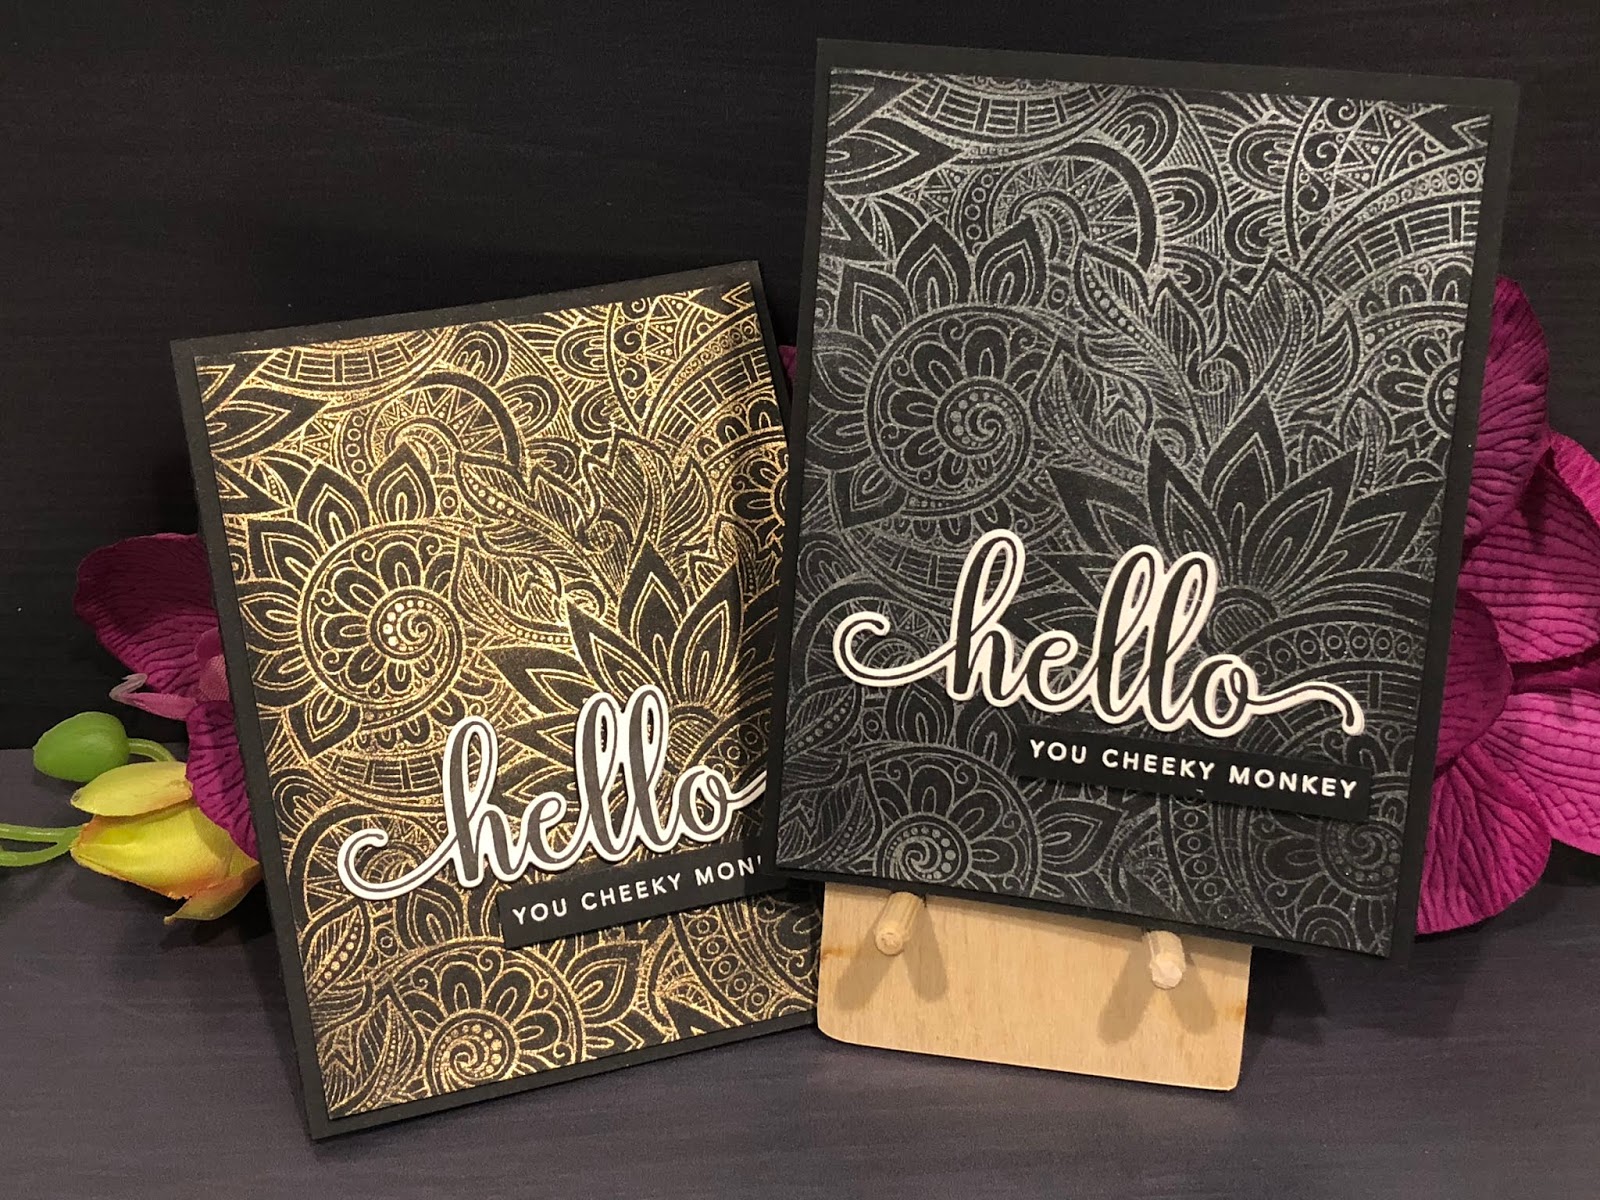
Hello, you cheeky monkey!

Embossing, Metallic Markers & Perfect Pearls


I fell in love with the Ornate Background stamp from Simon Says Stamp as soon as I saw it.  I pictured myself trying multiple techniques with it and these cards show the first few that I tried.


For this card, I treated the background panel of Neenah Solar White 80lb cardstock with my anti static powder tool, then I stamped the background image with Versamark embossing ink.  Next, I embossed the image using fine silver embossing powder from Ranger.  Once the background was ready for colouring, I pulled out my Crafter's Companion Precious Metals and Rare Minerals metallic markers and went to town colouring the image.  I love colouring.  I adhered the panel to a card base of Black Licorice cardstock from Lawn Fawn. 
This version of the card is simpler.  I treated the background panel of Black Licorice cardstock with my static powder tool, then I stamped the background image with Versamark embossing ink.  Instead of embossing in silver, I used a fine detail white embossing powder (also from Ranger).  I love the simple but dramatic contrast of the white on the black.


Below are two backgrounds that I created using embossing ink and Perfect Pearls powders in Perfect Gold and Perfect Pearl colours.  I set the powder with a fine mist of water.


The final touch for these cards is the fabulous sentiment - hello you cheeky monkey!  This is a CZ Designs stamp set with a matching die for the large "hello" sentiment. I stamped the large "hello" sentiment in Versafine Black Onyx ink on Neenah Solar White 80lb cardstock and die cut it.  I stamped the smaller sentiment on some Black Licorice cardstock and embossed it with white embossing powder.  Then, I adhered the sentiments to the card panel.


I love this set.  It's full of all kinds of snarky sayings that make me laugh out loud.  My girlfriends are definitely going to get a kick out of these cards. 

Friday, September 07, 2018

Cool Summer kit from Simon Says Stamp

Summer Themed Cards

Is anyone else not ready to let go of summer?  Autumn is my favourite season, but I'm just not ready to let go of the warm, lazy days of summer.  It's a dilemma, so what's a girl to do?  Make some more summer themed cards, of course!

Flamingos!

I was inspired by a design Heather Ruwe shared in the inspiration sheet that comes in the kit.  She created a background with the watermelon stamp from the One Cool Pineapple stamp set.  I loved that design and I used that idea with each of the images in the set, starting with the flamingo (what says summer better than flamingos?).

I stamped the images on smooth bristol paper and coloured them with Nuvo Aqua Flow pens and used a bit of water to pull the colour out into the images, for a light watercolour look.  I added a hand typed sentiment on a die cut stitched rectangle that I adhered to a die cut scalloped rectangle, which I popped up.  The friend I'm planning to send this card to will get a kick out of the cheeky sentiment!

For my second flamingo card, I used the Nuvo Aqua Flow pens to create a sunny beach scene for my die cut flamingo.  I cut the handsome fellow out of Simon Says Stamp glitter cardstock and added him to the scene.  Next, I added the sentiment, which is from the One Cool Pineapple stamp set, and added a flock of "pigeons" to the background.  It's a fun summer themed card.

I am quite enjoying the Nuvo Aqua Flow pens, but I clearly need a bit more practice!

Summer fruit


Pineapples make me happy!  They remind me of Hawaii, which is one of my favourite places in the world.  Adding the cool sunglasses to them just makes me like them even more.  In addition to colouring the pineapples, I also added a light blue wash between and around them, for a bit of added interest.  I made sure to leave room for the sentiment, and added the panel to a top folding card base.


Watermelon always makes me think of summer.  Same design and colouring technique as with the other backgrounds I created, but I added some stamped hearts in the white space between the slices.  I like that added touch.  It provides a touch of black on the card to match the stamped sentiment.


Summer images

The variety of summer images in the One Cool Pineapple stamp set is part of what drew me to purchase the kit.  Well, second to the flamingo, of course.  😉  The sunshiny face, the cactus and the fish were all perfect summer images.  There is a little something for everyone.


Saturday, January 13, 2018

Valentine's Day card


This is a card that I made for my parents for Valentine’s Day. 

I started by cutting a white cardstock panel using the largest Lawn Fawn Outside-In Stitched Rectangle Stackable die.  I die cut a three- layered heart, twice in different colour combinations, using the Caprice Heart A – C dies from Birch Press Designs.  The falling hearts in the background are from Concord & 9th’s Love Always stamp set and they are stamped using Peppermint Scrub ink by Catherine Pooler Designs.  The sentiment comes from the Simon Says Stamp Thoughtful Messages stamp set and is stamped in Versafine Black Onyx ink, which is my favourite ink for sentiments. 

On the inside of the card, I used an old sentiment stamp from Hero Arts that I’ve had for years.  It’s a favourite, so I use it almost every year.  The white cardstock that I used is Neenah Solar White (80lb) and the coloured cardstocks are unknown - I found them in my scrap bin.  Because I've been crafting for quite a few years now, I have collected some pretty good scraps and I have recently been making an effort to use them up.  I have a long way to go!

As I have had the layered heart die for quite some time but haven’t used it, I was inspired to participate in this week’s Work Your Stash Wednesday Challenge.

This is my first blog post, as I'm sure you can tell.  I hope I'm doing it right!