Showing posts with label Lawn Fawn paper. Show all posts

Wednesday, June 26, 2019

Halloween Banner

Cats and Bats and Ghosts (no Rats or Elephants)

My sister and nephew love to celebrate Halloween.  I made a banner for them to help decorate the house, but I forgot to post it in October.  Better late than never! 

The Lawn Fawn Stitched Party Banners are perfect for a project like this.  I used the smaller banner and the circle included in the set.


Sunday, October 14, 2018

Interactive Slider Halloween Card

Sunny Studio Stamps Slider Die

This year I am really drawn to Halloween products and I'm using them like crazy.  For this card, I combined the Sunny Studio Stamps Slider die with the Halloween stamps from Catherine Pooler Designs and Halloween-themed dies from Lawn Fawn.  The front panel is Kraft cardstock stamped with the Going Batty background stamp (CPD) using Versafine Black Onyx ink and then embossed with clear Wow embossing powder.  Then I die cut the panel using the interactive slider die (Sunny Studio).


The bat dies are from the Lawn Fawn Tiny Gift Box Bat add-on set.  I love this little guy!  The black cardstock I used for the card is Gina K Designs Black Onyx.  The grey and white paper pieces are from my scrap bin and the orange sparkle cardstock that I used for the bat's wings and feet is from the Lawn Fawn Autumn Sparkle Cardstock pack.


The sentiment strip (cut by hand), and the sentiments and images used under the slider tab, are from the Everything But the Broom stamp set by Catherine Pooler Designs.  I also stamped a "pull here" sentiment from the Lawn Fawn Push Here stamp set to let the recipient know that this is an interactive card.


I stamped the sentiments and images in Versafine embossing ink and embossed them with clear Wow embossing powder.  It's hard to capture in the pictures, but it shows up well in person.


Above and below show the slider at various stages of movement.


The sentiment and images on the inside of the card adds to the cute Halloween mood of the card.  Boo!  (Everything But the Broom)


Saturday, October 06, 2018

Interactive Reveal Wheel Halloween Card

Reveal Wheel Card

The Reveal Wheel die set by Lawn Fawn is simple and well designed.  I love that it is so easy to use.

I die cut two panels with the largest die in the set and used the pumpkin-shaped insert die to create the reveal wheel hole.  On the front panel I used paper from the Lawn Fawn Knit Picky Fall 6 x 6 paper pack, cut to the appropriate shape using the panel die.  The green paper is my "grass" and the orange paper is the "sky". I love everything about Lawn Fawn products, but how great is this paper?  The Pick of the Patch stamp set and matching dies are a great Halloween and fall-themed set that work perfectly with this interactive card die set.

I coloured the spinning wheel, inside the embossed line, with the same Copic markers that I used to colour the pumpkins.  Then I stamped several of the faces on the spinning wheel to show through the pumpkin-shaped image.  I coloured several squirrels and their accessories to include in my scene.  Putting the scene together was so much fun!

How great are the faces in this set!


Check out the great little details that Lawn Fawn puts in their die sets (that cute little arrow) and the stamp sets (that happy little squirrel and the lid for the pumpkin).  How can you not love Lawn Fawn?


Tuesday, October 02, 2018

Halloween Tea Light Boxes


Spellbinders Large Die of the Month Club

The September large dies are fantastic.  I love the Halloween theme for the Spellbinders September large die of the month. It includes dies to create a tea light holder with four different Halloween themed plates.
This is the pumpkin plate used four times, shown lit up with a tea light in both light . . .
. . . and dark settings.
The second of the four design plates is a trick or treat sentiment. Again, photographed in the light (left) and dark (below).

They look so nice lit up, don't they?


And a black cat! My nephew has a black cat and he's going to love this!


And ghosts, too!  How adorable are these little guys?
 Little "ghosteses" all lit up!
My parents aren't as into Halloween as my sister and nephew, so I made just one tea light holder for them, but I used one of each plate so they can turn it around to whatever design they want to look at (above and right).

I hope Spellbinders does a Christmas version of this die set.

Friday, September 28, 2018

Colouring with Prismacolor Pencils on Dark Cardstock

Dark cardstock presents an interesting tapestry for colouring and the Kaleidoscope Centre Cut background by Simon Says Stamp is a beautiful stamp for colouring.  I embossed the entire stamp image (centre cut piece kept in) with silver embossing powder, because I wanted to try colouring with Prismacolor pencils.  I used multiple colours on the pattern, but I left quite a bit of black to show off the colouring and the colour of the sentiment.  I used purple, green and blue on this background.  The sentiment is from the Altenew Halftone Hello stamp set (I also used the matching die).  I stamped "hello" in a matching purple colour and the rest of the sentiment was white heat embossed on a strip of black cardstock (Licorice by Lawn Fawn).

This version is the same, except I used blues with a little blue-green for accent.
This one has white pencil colouring and a green sentiment.

I think the purple one is my favourite.

Tuesday, September 18, 2018

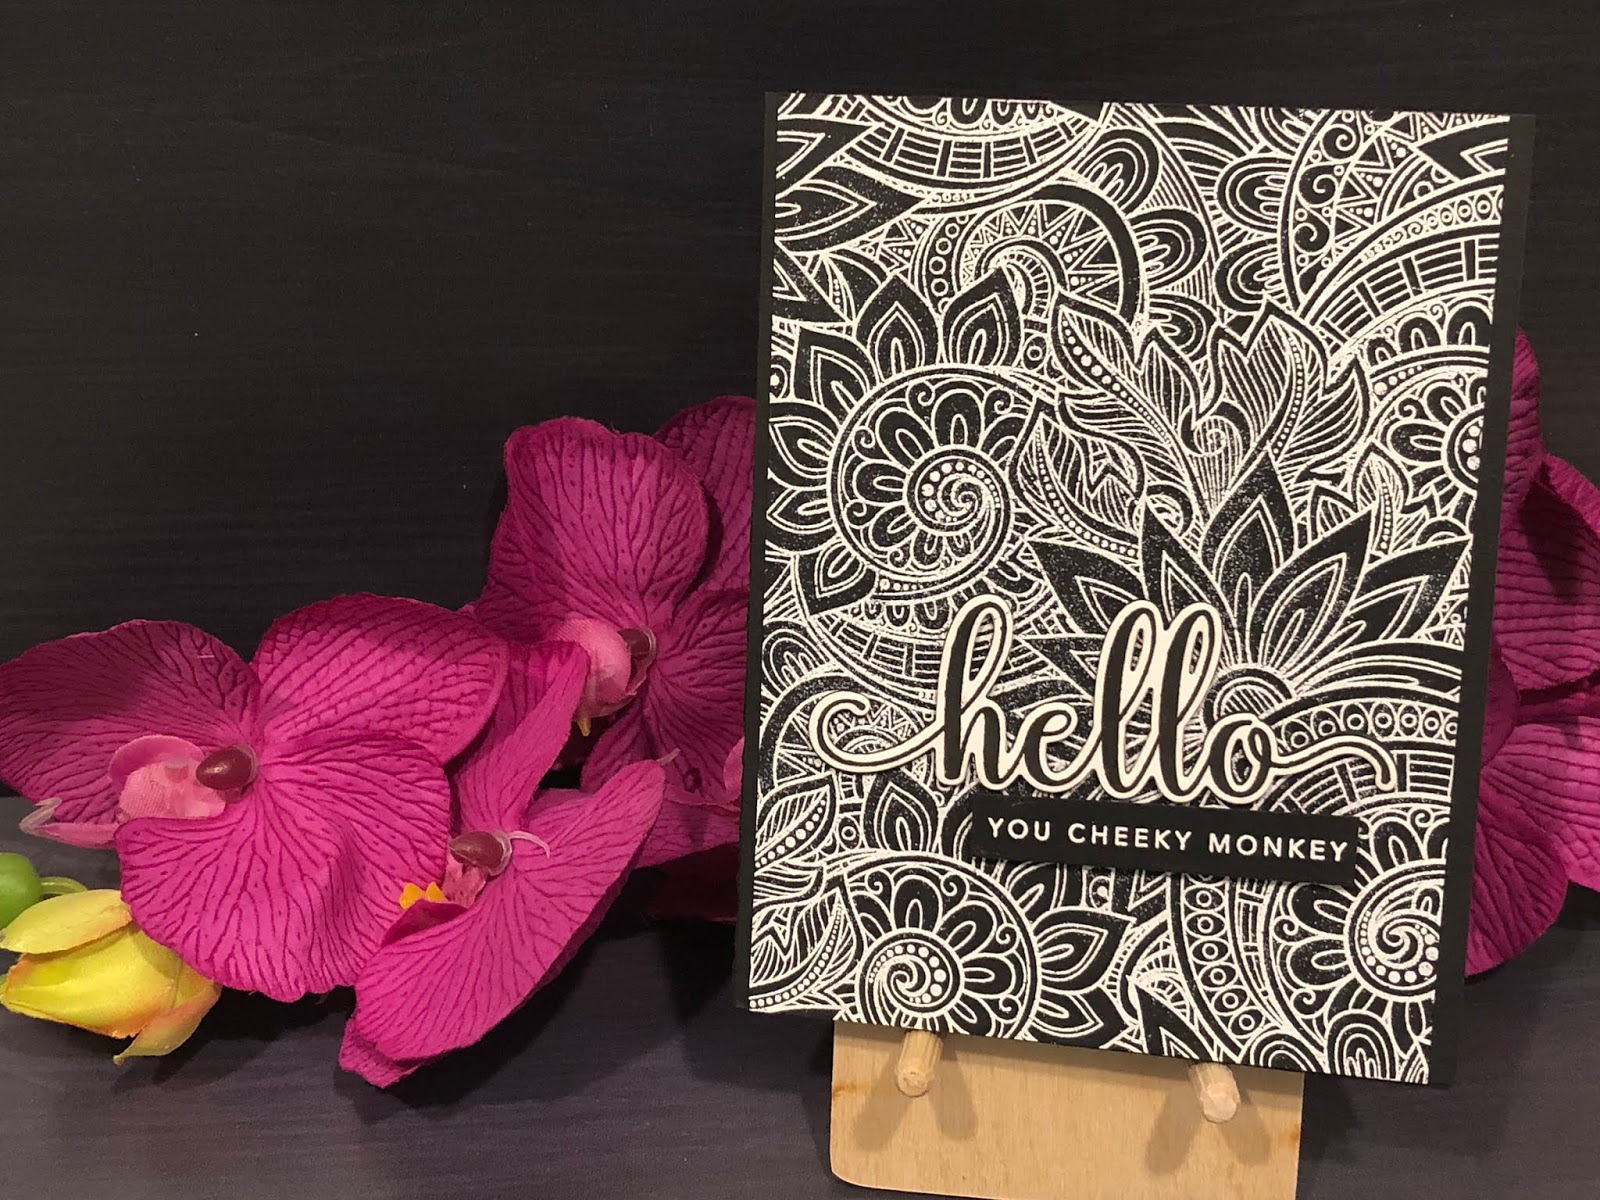
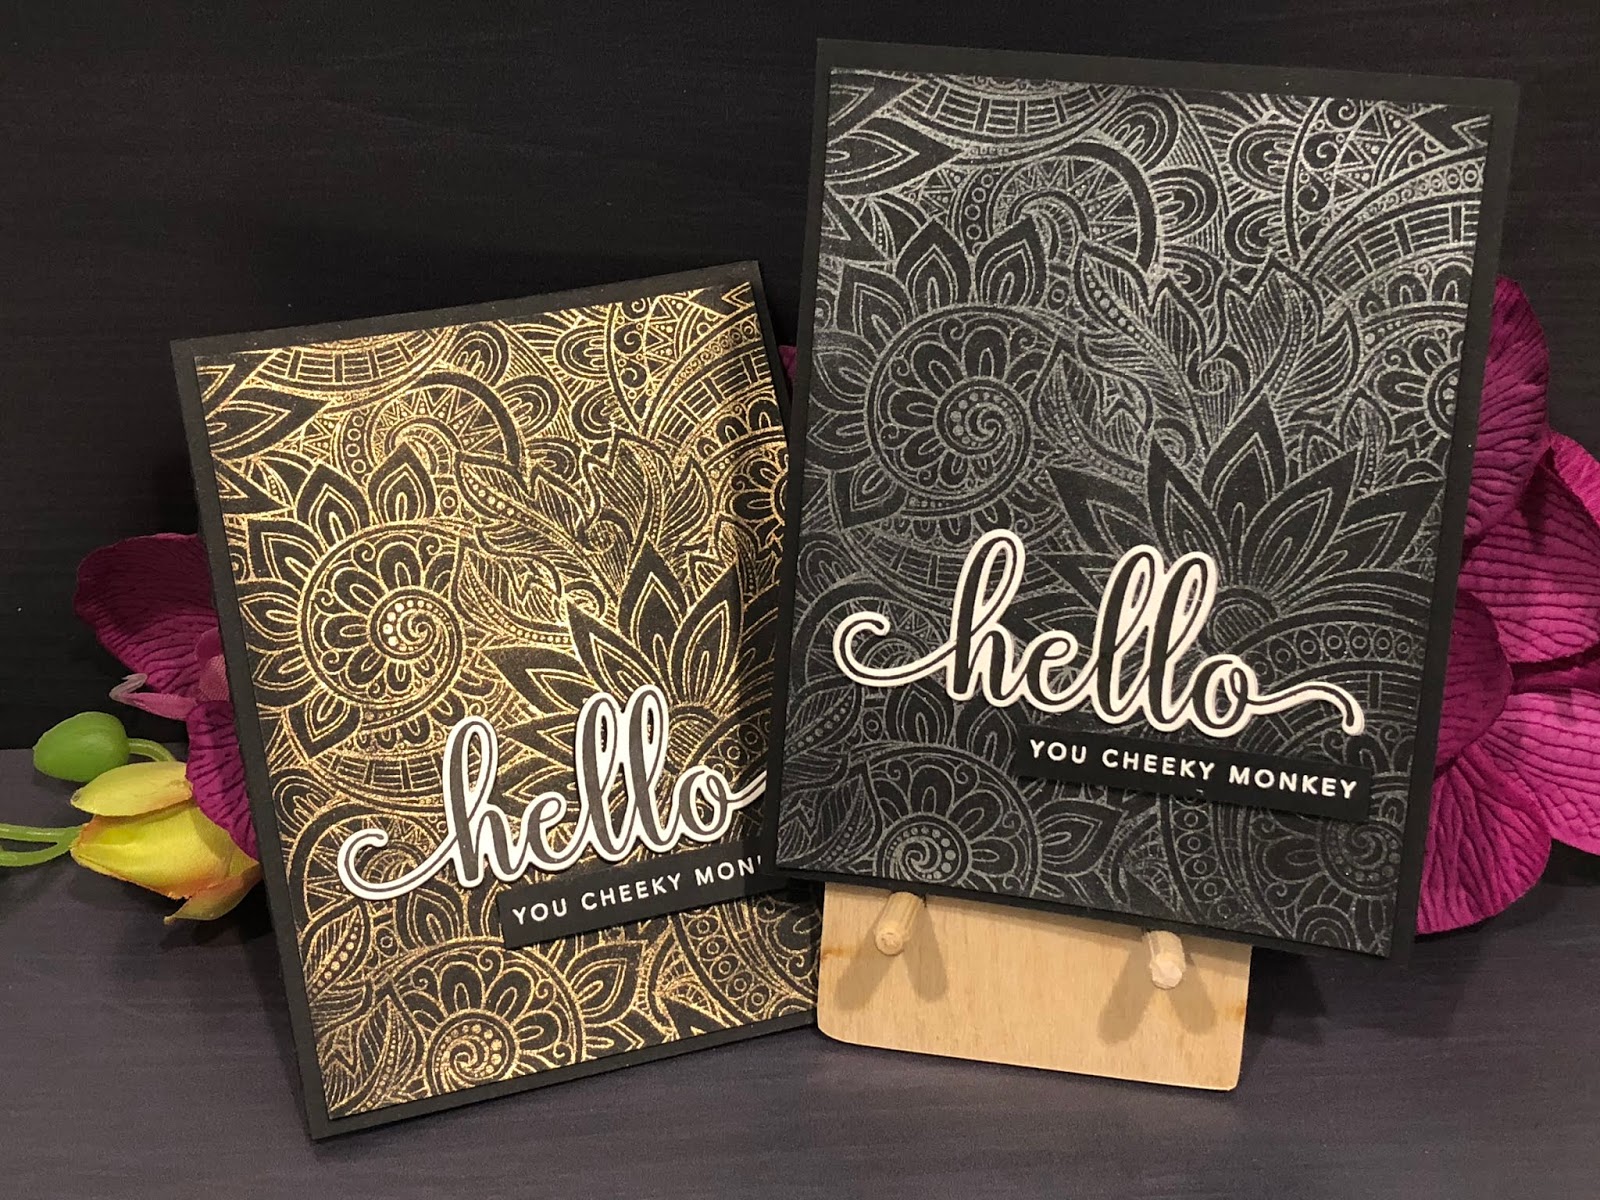
Hello, you cheeky monkey!

Embossing, Metallic Markers & Perfect Pearls


I fell in love with the Ornate Background stamp from Simon Says Stamp as soon as I saw it.  I pictured myself trying multiple techniques with it and these cards show the first few that I tried.


For this card, I treated the background panel of Neenah Solar White 80lb cardstock with my anti static powder tool, then I stamped the background image with Versamark embossing ink.  Next, I embossed the image using fine silver embossing powder from Ranger.  Once the background was ready for colouring, I pulled out my Crafter's Companion Precious Metals and Rare Minerals metallic markers and went to town colouring the image.  I love colouring.  I adhered the panel to a card base of Black Licorice cardstock from Lawn Fawn. 
This version of the card is simpler.  I treated the background panel of Black Licorice cardstock with my static powder tool, then I stamped the background image with Versamark embossing ink.  Instead of embossing in silver, I used a fine detail white embossing powder (also from Ranger).  I love the simple but dramatic contrast of the white on the black.


Below are two backgrounds that I created using embossing ink and Perfect Pearls powders in Perfect Gold and Perfect Pearl colours.  I set the powder with a fine mist of water.


The final touch for these cards is the fabulous sentiment - hello you cheeky monkey!  This is a CZ Designs stamp set with a matching die for the large "hello" sentiment. I stamped the large "hello" sentiment in Versafine Black Onyx ink on Neenah Solar White 80lb cardstock and die cut it.  I stamped the smaller sentiment on some Black Licorice cardstock and embossed it with white embossing powder.  Then, I adhered the sentiments to the card panel.


I love this set.  It's full of all kinds of snarky sayings that make me laugh out loud.  My girlfriends are definitely going to get a kick out of these cards. 

Monday, September 03, 2018

Lawn Fawn Birthday Cards

Birthday Cards for my Stash

My birthday card stash was a little low, so I thought I would make some cards that could be used for a variety of ages.  Since I absolutely love my Lawn Fawn stamps and dies, I thought I would use those products and make multiple cards in the same style.  I also used two different background colours, both of which can be used for either male or female recipients.


The side-fold card base is made from Lawn Fawn cardstock in Peacock (above) or Chili Pepper (below).  I cut the Quilted Backdrop die cut cover plate out of Neenah Solar White 80lb cardstock and layered it on the card base using my Lawn Fawn glue pen.  

The coloured images are from the Simply Celebrate stamp set, which I stamped in Momento Tuxedo Black ink (because it is Copic friendly).  Next, I coloured the images in rainbow colours with my Copic markers and die cut the images with the matching dies set.  I then popped the images up onto the card front using dimensional adhesive.


The last step was to stamp a sentiment, using Versafine Onyx Black ink, onto banner strips that I had cut and fish tailed by hand.  To keep the banners from blending into the background, I cut small pieces of cardstock that matched the card base and glued those pieces to the back of the banners.  The sentiment strips were then adhered to the card, also with dimensional adhesive.

I love the images in the Simply Celebrate set and very much look forward to making more cards using the holiday version!


Tuesday, March 27, 2018

Concord & 9th Christmas Cards

Ornamental Bundle

I was having quite a bit of fun making Christmas cards this year, especially using the Concord and 9th Christmas release.  For my first card, I made two colour combinations – red & gold and green, red & gold. I used Ranger embossing powder to emboss both the ornament and the sentiment and then I die cut the ornament and an ornament topper, adhered the topper on the ornament and  added an ornament string.

Concord & 9th Ornament - red and gold


Concord & 9th Ornament - red, green and gold


I used Ranger embossing powder to emboss both the ornament and the sentiment and then I die cut the ornament and an ornament topper, adhered the topper on the ornament and  added an ornament string. Lastly, I popped the ornament up on foam tape and placed it on a background of Lawn Fawn patterned paper.

Trim the Tree w/turnabout stamp background

The Trim the Tree set looks so good with the Christmas Cheer Turnabout stamp set. I am really
pleased with how these cards turned out.

Tree stripe detail with bow topper
Stamped ornaments on tree with star topper


I used Lawn Fawn inks to stamp the turnabout in different colour combinations and added the die cut tree to the front of the card panel. The tree was stamped with a sentiment and ornaments or with the stripes border stamp, using Versamark ink, to create dimension. The tree topper is either a die cut star or bow.